Help
How to use Moto Tour Manager
A walk through a whole trip, from the invitation to settling up, using a made-up tour - Alsace & Black Forest, three riders, four days. Steps only a trip's organisers can do are marked Organisers
- Before you start
- Add it to your phone
- 1. Joining
- 2. Creating a trip
- 3. Planning the days
- 4. Stays
- 5. Points of interest
- 6. Expenses and settling up
- 7. On the road
- 8. Night mode
Before you start
A few things that hold true everywhere in Moto Tour Manager. The sections below then take you through a trip step by step - open the one you need, or .
What it's for
One place for a group tour, by motorcycle or car. Everyone on a trip sees the same plan, kept up to date as it changes:
- Overview - the trip at a glance, and today's day while you're on the road.
- Itinerary - each day's route, distance, time and weather.
- Stays - where you're sleeping each night.
- Expenses - the shared kitty, and who owes whom.
- POIs - points of interest worth a detour.
Finding your way
On a phone, the five pages are along the bottom. At the top: + adds something to the page you're on, the moon / sun switches night mode, and your photo opens a menu - My trips, My details, How to, FAQ and Sign out.
On a computer, the same pages are in the menu down the left (it folds away for more room), with your name and photo at the bottom of it.
Who can do what
Organisers run a trip: its details and people, the days, the stays, and marking it complete. A trip can have several.
Everyone on a trip sees all of it, and adds expenses and points of interest.
Administrators look after the accounts, and choose who can create trips.
Your active trip
The five pages show one trip at a time - your active trip, named at the top. To see another, open My trips and choose Make active on it. Each phone or computer remembers its own choice.
Adding and changing things
An Add button (or +) opens a pop-up. Save adds something new; Update saves your changes to something that's already there. Cancel or Close leaves it as it was - and if you've typed anything, it asks before throwing it away.
Changes show for everyone on the trip straight away.
Money
Add each cost in the currency you paid in. When a trip spends in more than one currency, everything is also shown in the trip's home currency - at today's rate until the day it was paid, then at that day's rate.
Each person's share is worked out as you go; Settle up turns it into as few payments as possible.
Privacy
- Your home address and documents are only ever shown to you.
- Your location is only shared if you switch it on, only on a trip's days and only while the app is open.
- Nobody can browse a list of everyone who uses Moto Tour Manager.
No signal?
Pages you've opened recently are saved on your phone, so you can still check the day's route, tonight's stay and the kitty in a dead spot - a note at the top says you're looking at saved information. Adding or changing anything needs a connection.
Add it to your phone
Phone or computer
Moto Tour Manager is a website that installs like an app: an icon on your home screen that opens full screen, with no app store needed. It keeps itself up to date.
iPhone or iPad
- Open mototourmanager.com in Safari.
- Tap the Share button - the square with an arrow pointing up. (On newer iPhones it may be inside the ••• button first.)
- Scroll down and tap Add to Home Screen. If you see Open as Web App, leave it switched on.
- Tap Add.
Open it from the new icon. You may need to sign in once more the first time.
Android
- Open mototourmanager.com in Chrome.
- Tap the ⋮ menu at the top right.
- Tap Add to Home screen (or Install app), then Install.
It appears on your home screen and with your other apps.
Computer
- Open mototourmanager.com in Chrome or Edge.
- Click the install icon at the right-hand end of the address bar (a screen with a down arrow) and choose Install.
It opens in its own window, and can be pinned to the taskbar or dock.
To share your location on the road, allow location when your phone asks - in the installed app as well as in the browser.
1. Joining
3 steps
Moto Tour Manager is invite-only - you join when someone invites you.
You get an invitation
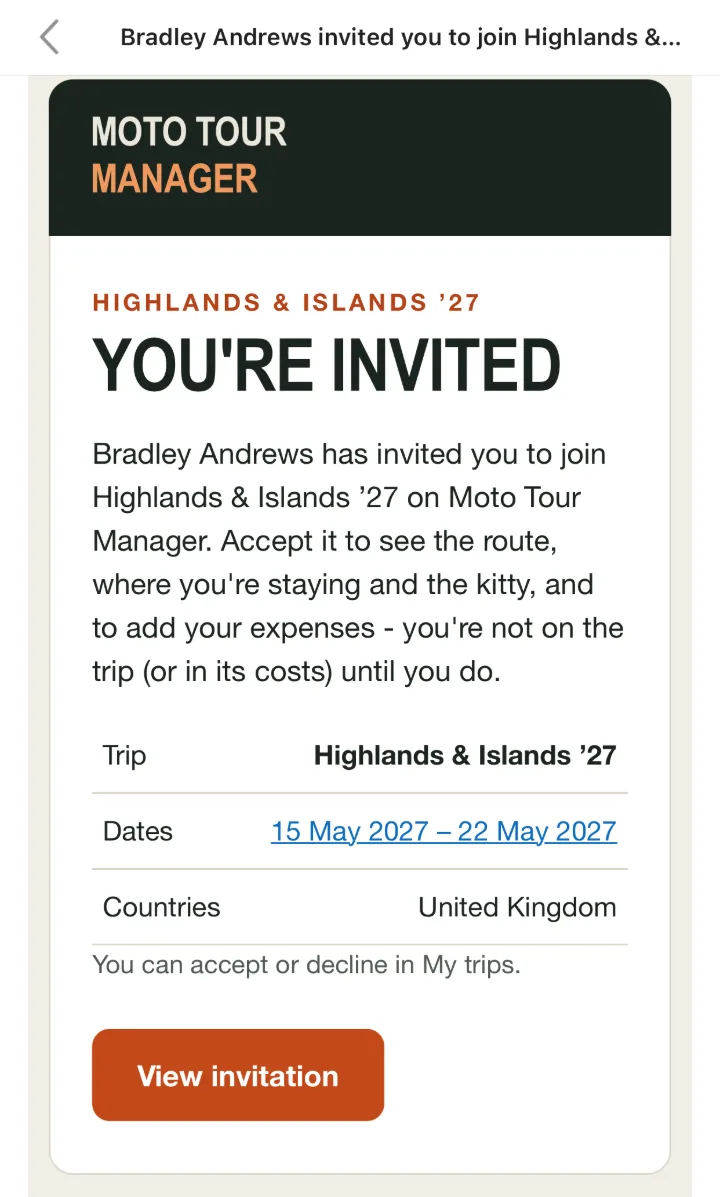
When a trip's organiser invites you, an email arrives with the trip's name, dates and countries. Tap View invitation.
You're not on the trip, or in its costs, until you accept.
Sign in
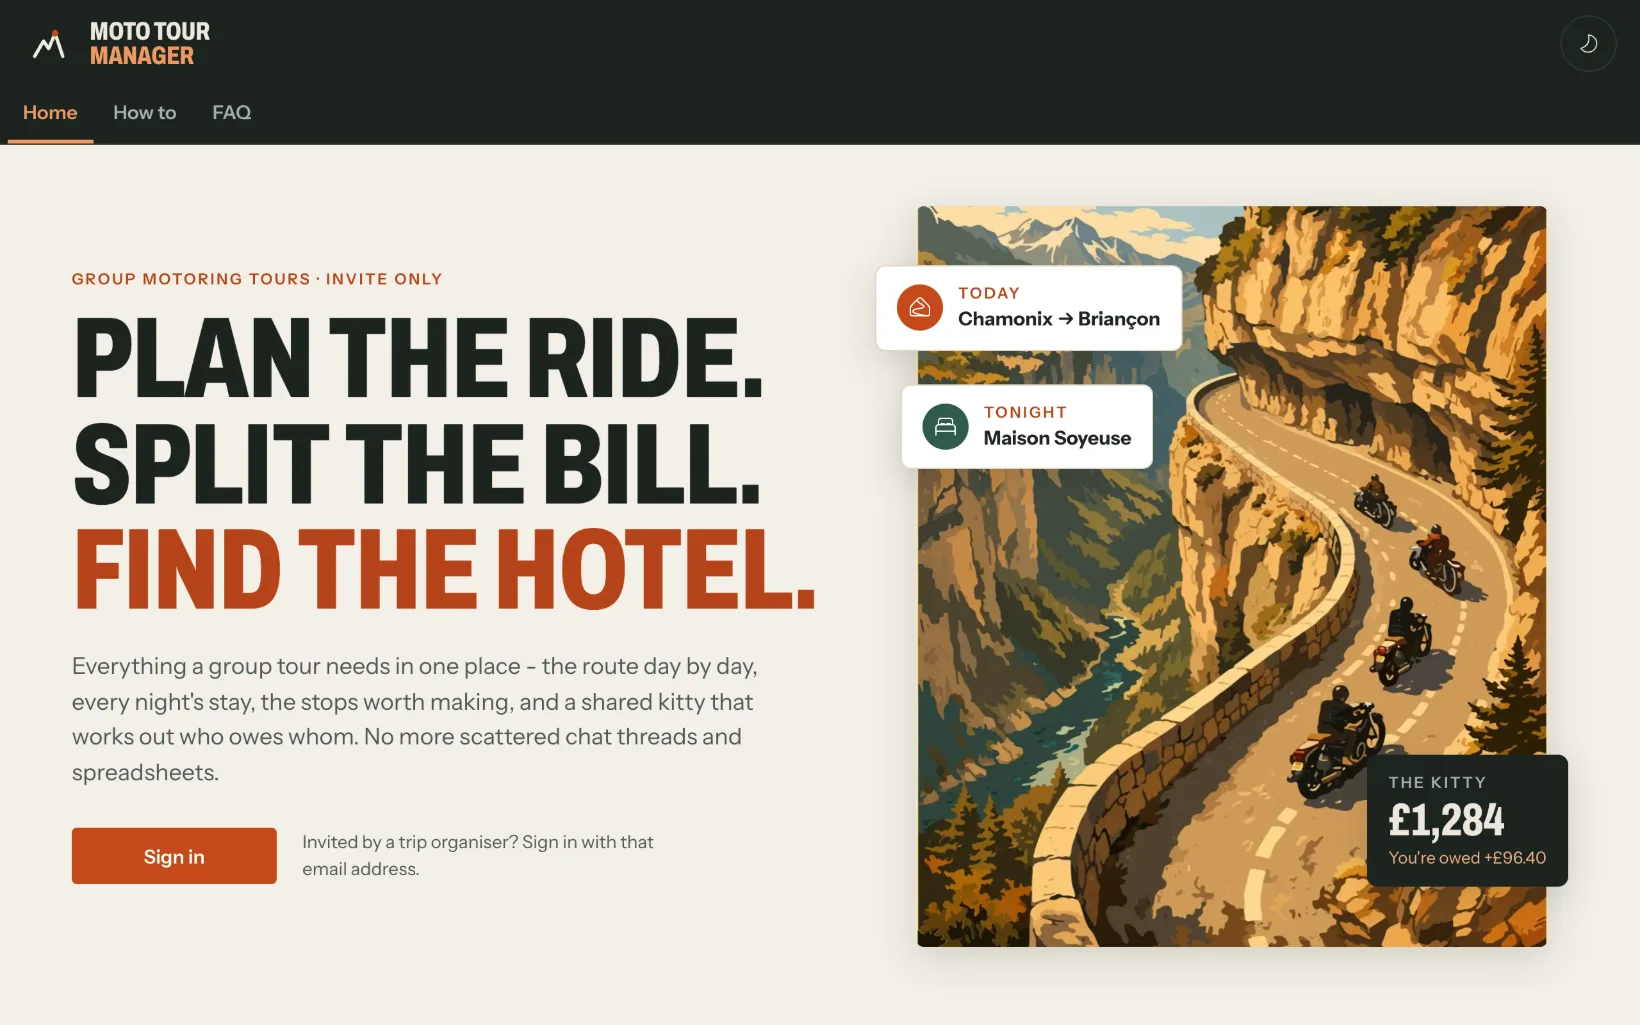
Choose Sign in. The first time, create your account with the email address the invitation was sent to - a different address won't find your invitation.
Accept the invitation
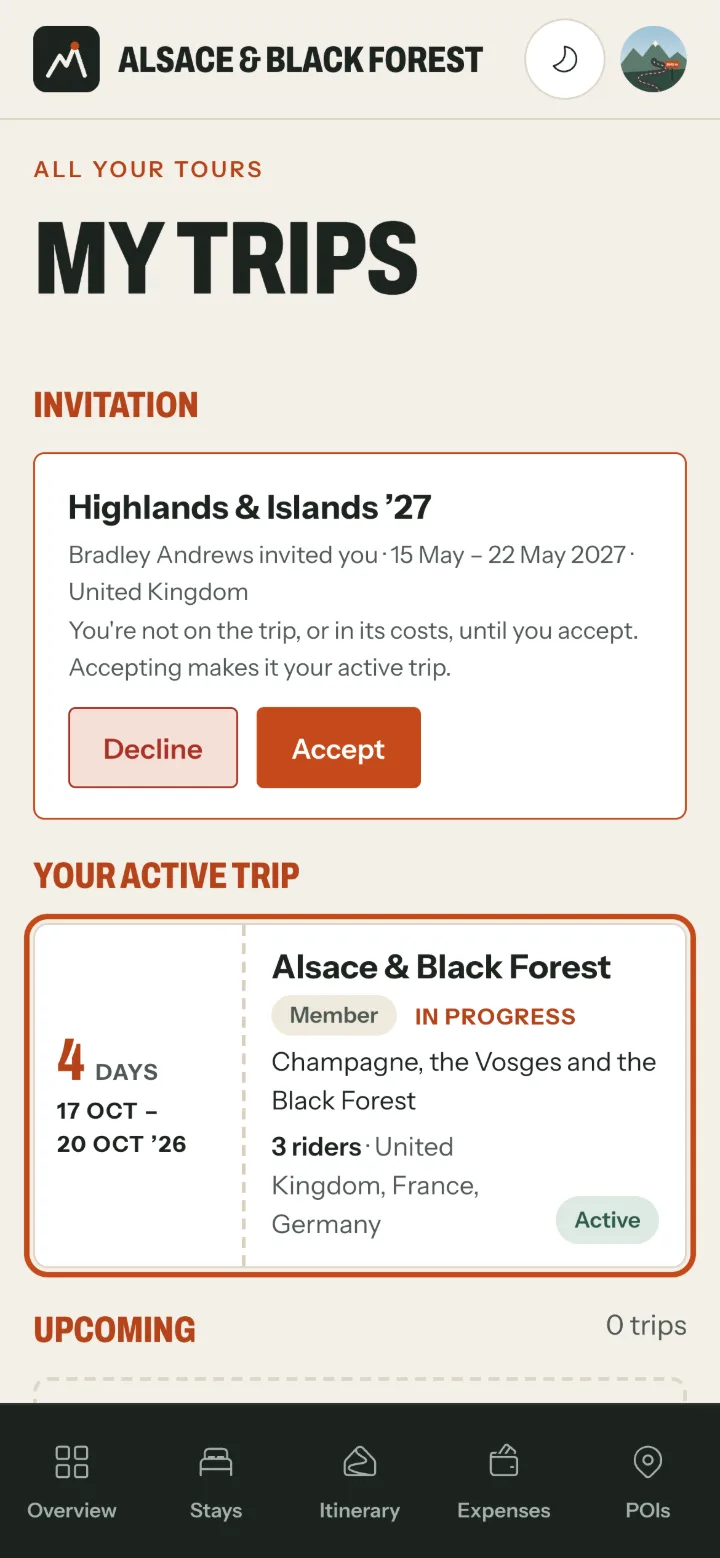
Invitations wait at the top of My trips. Choose Accept to join - the trip becomes your active trip - or Decline.
If you already use Moto Tour Manager, this is all you need to do: sign in as usual and the invitation will be there.
2. Creating a trip
4 steps
Organisers Only accounts an administrator has allowed to create trips see the Create trip button - ask an administrator if you'd like to run one.
My trips
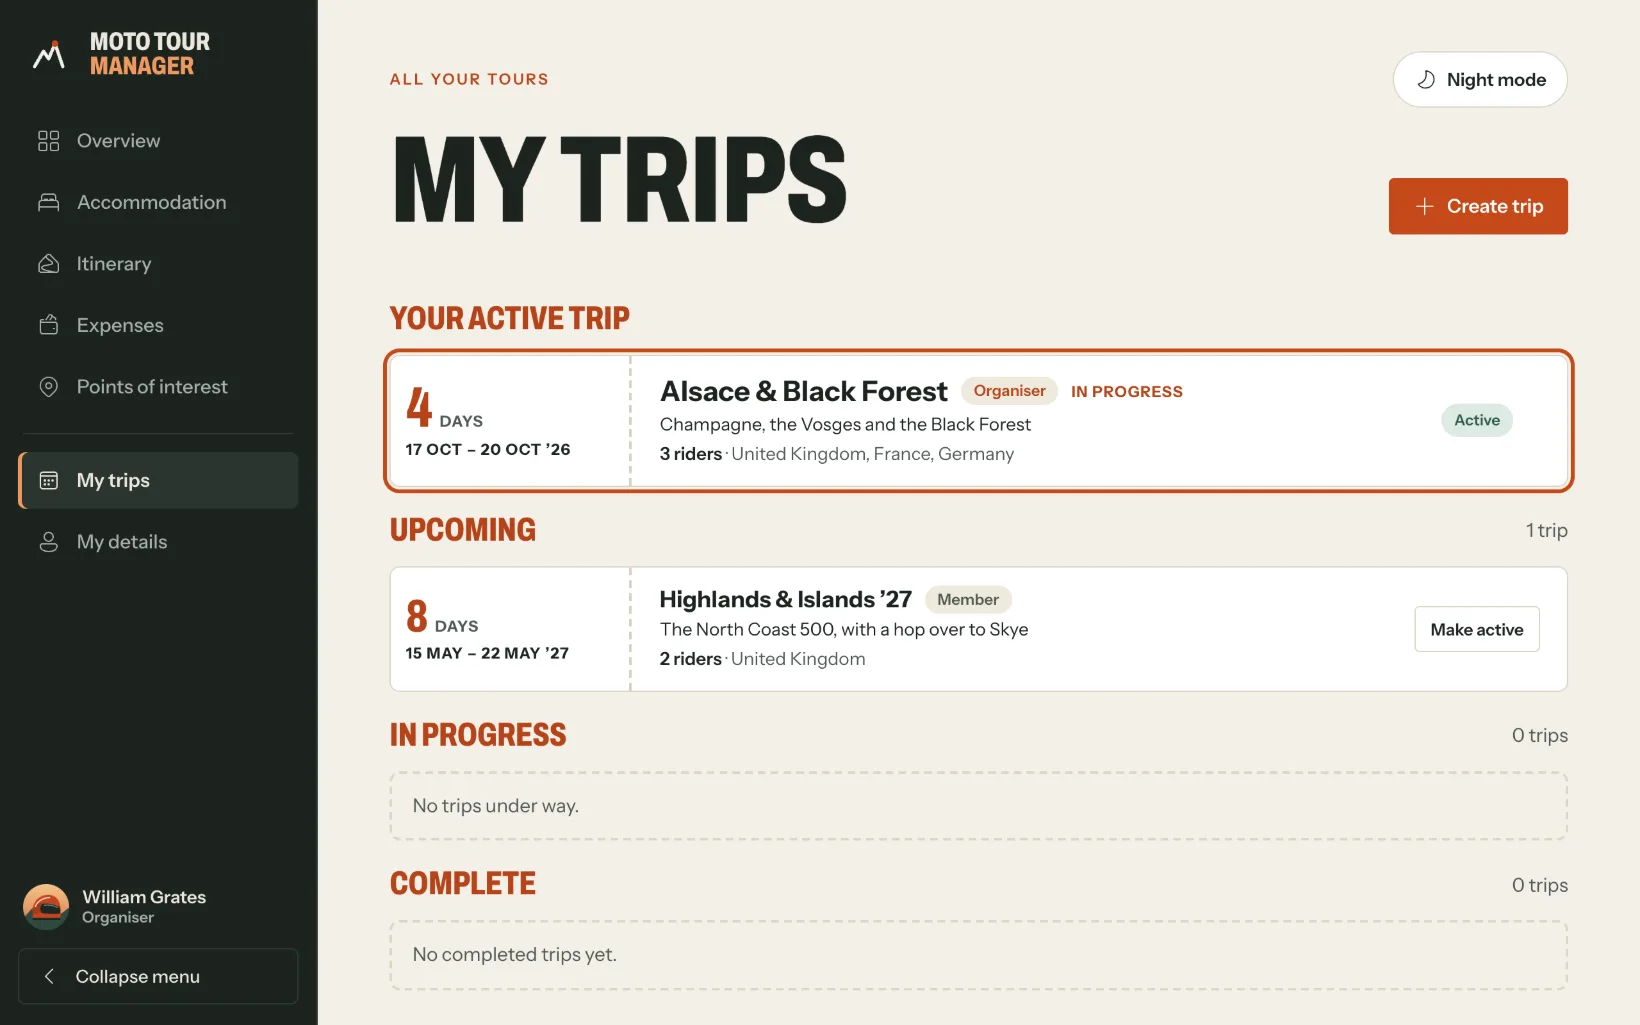
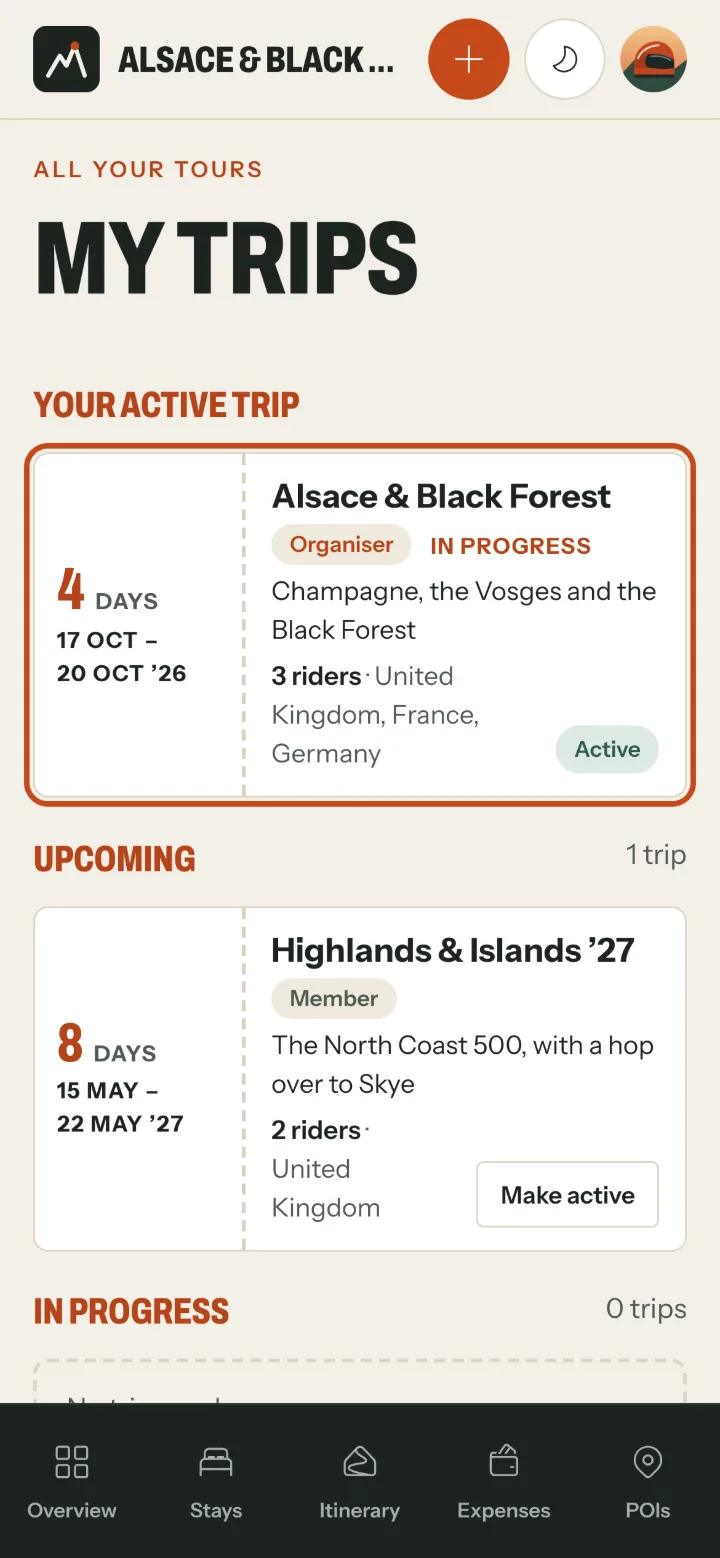
All your trips, sorted into Upcoming, In progress and Complete by their dates, with your active trip at the top. The pills show whether you're the trip's Organiser or a Member. Choose Create trip to start a new one (the + at the top on a phone).
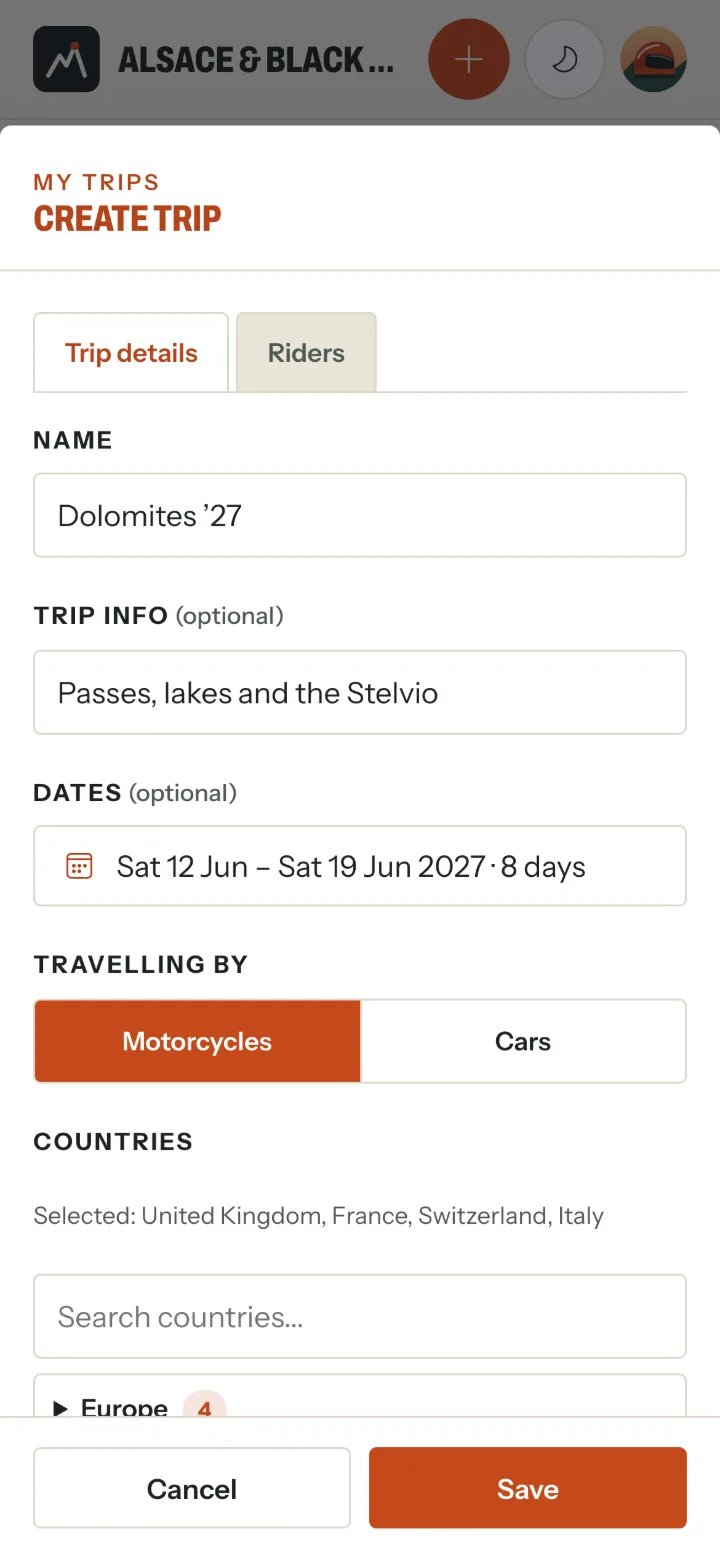
Trip details
Give the trip a name and, if you like, a line of trip info (it shows under the name in My trips). Then:
- Dates - tap the first day, then the last.
- Travelling by - motorcycles or cars (it changes the app's wording to suit).
- Countries - tick every country the trip visits.
- Home currency, Distances in miles or kilometres, and Currency conversion - choose Convert to home currency if you'll spend in other currencies.
Who's coming
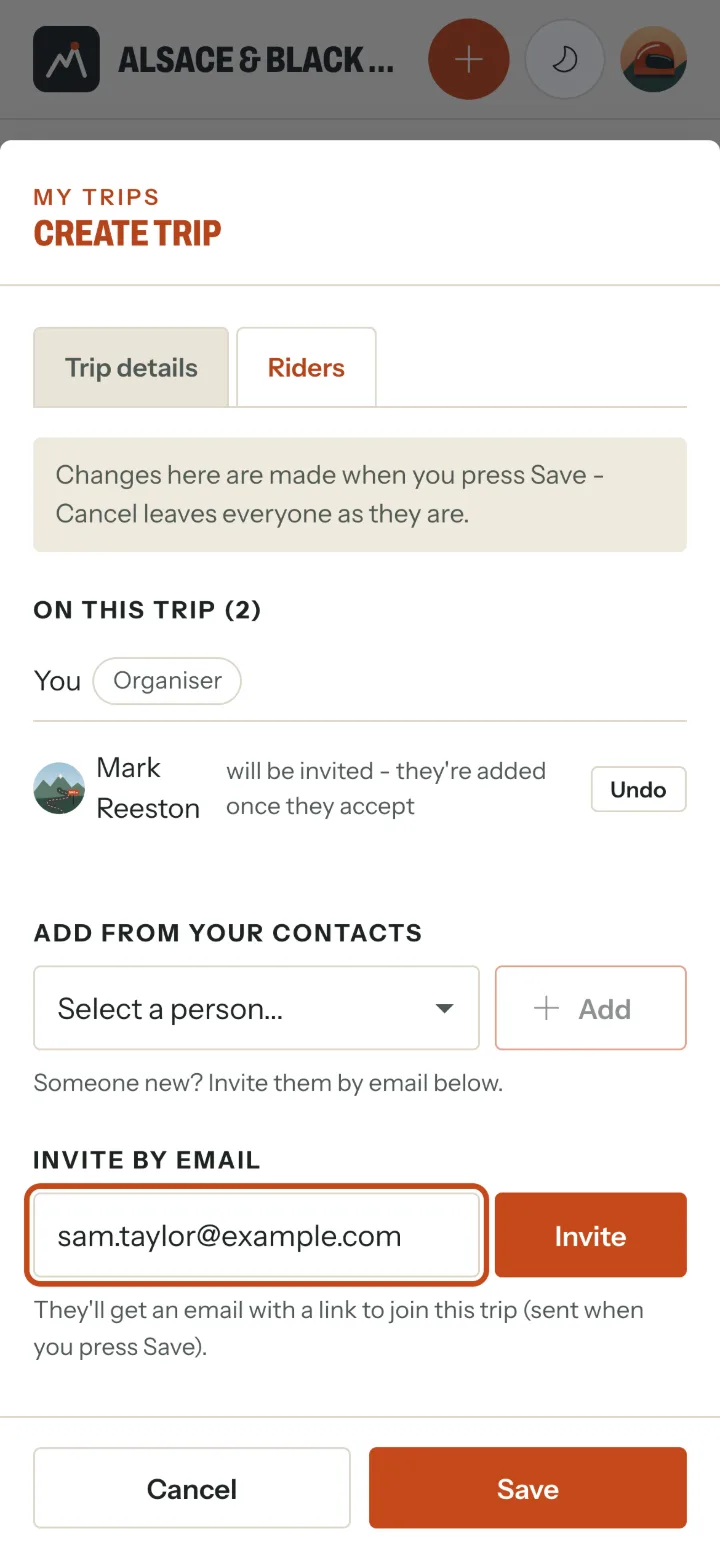
On the Riders tab (Drivers on a car trip):
- Add from your contacts - people you've travelled with or invited before. They're invited, and added once they accept.
- Invite by email - anyone new. They get an email with a link to join.
Nothing is sent until you press Save.
Choose your active trip
The Overview, Stays, Itinerary, Expenses and POIs pages all show your active trip. To look at another trip, choose Make active on it.
It's remembered on each phone or computer separately.
3. Planning the days
6 steps
Organisers plan the days; everyone sees them.
The itinerary
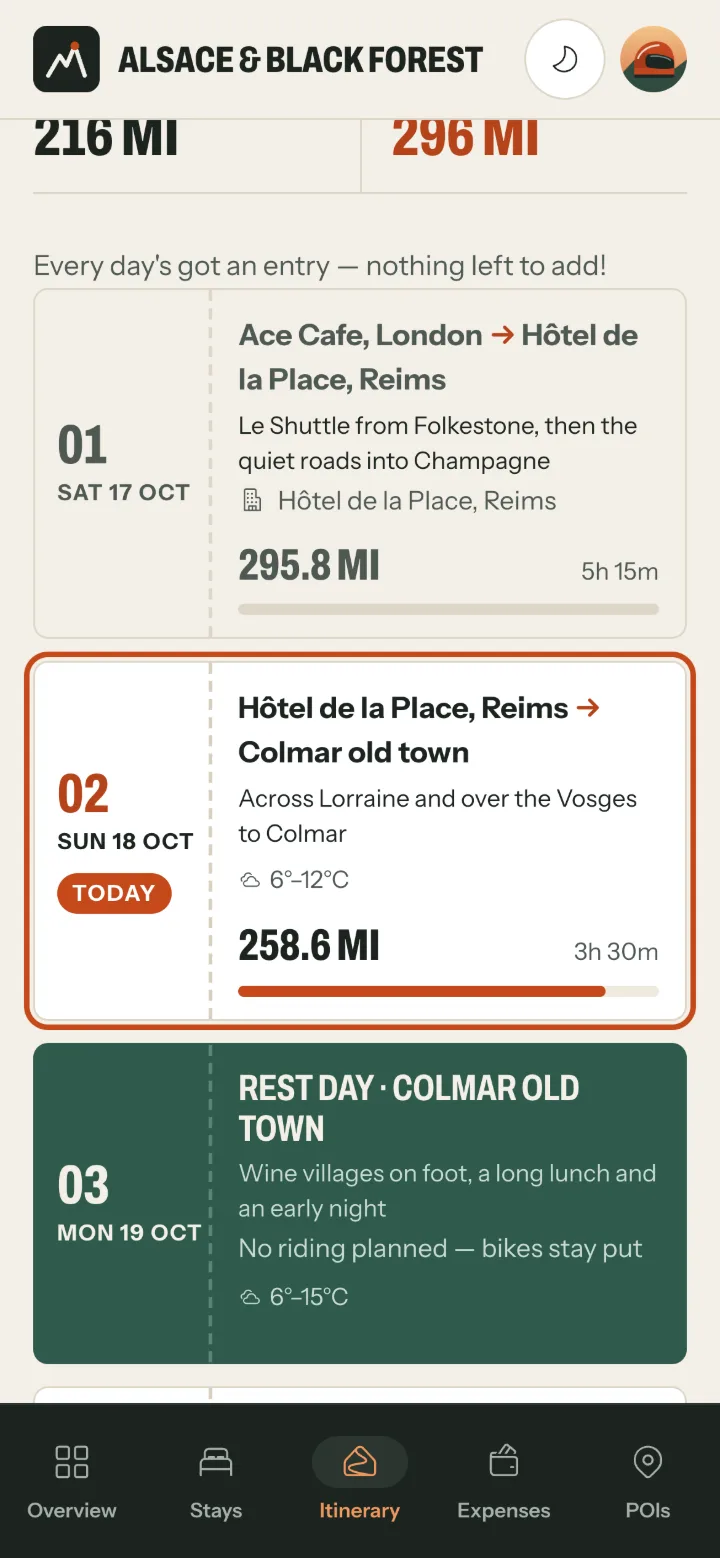
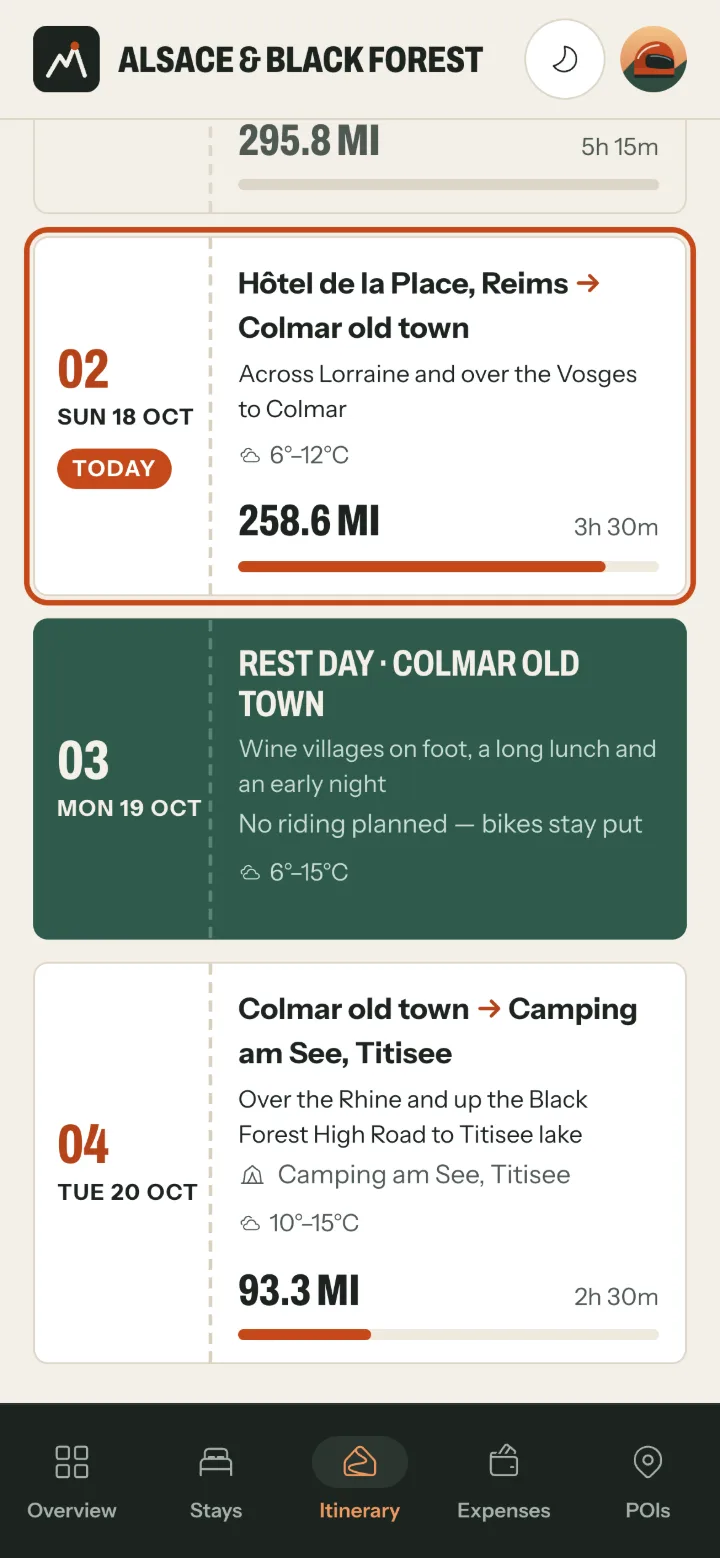
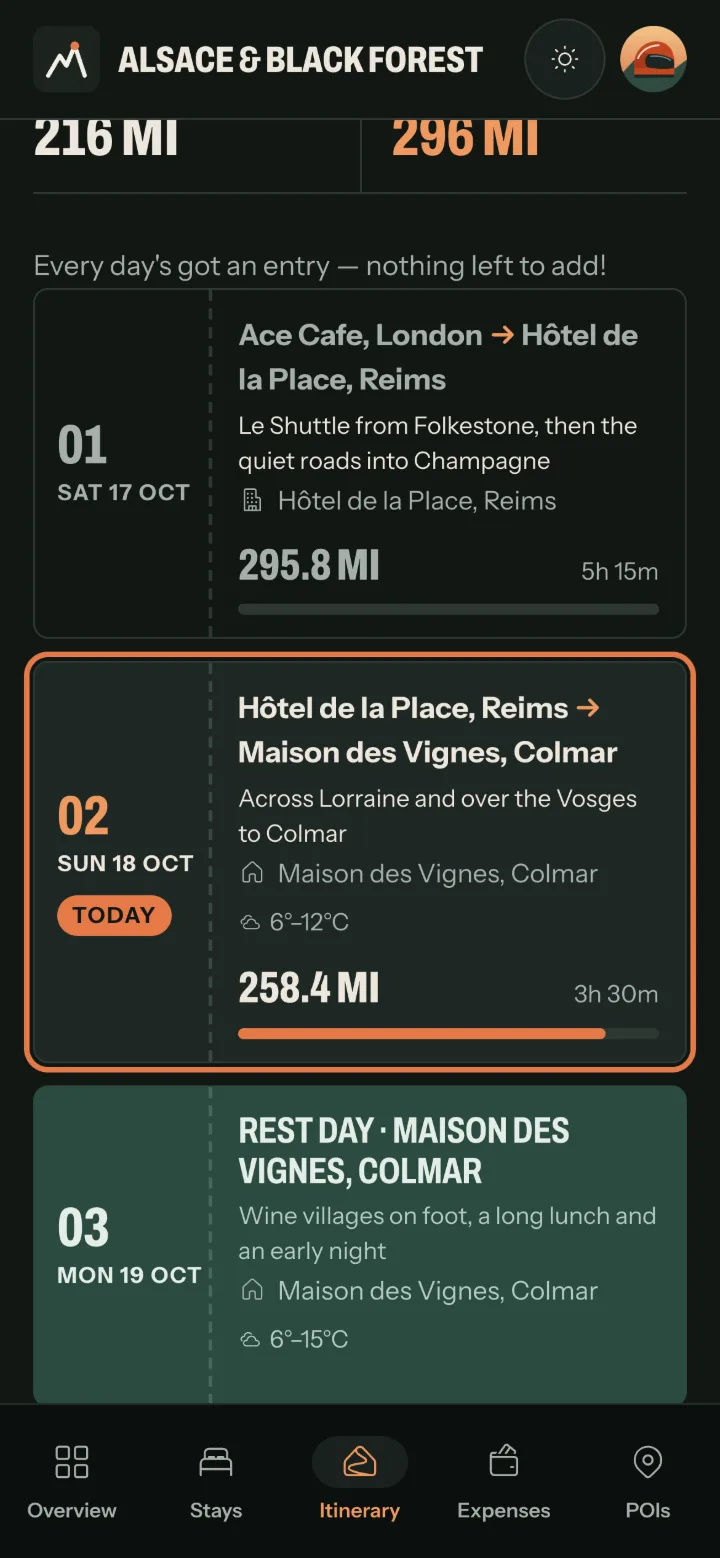
One ticket per day: where it starts and ends, the day overview, tonight's stay, the distance and riding time - and the weather once the day is close. Today's day is outlined. Tap a day to open it.
Add a day
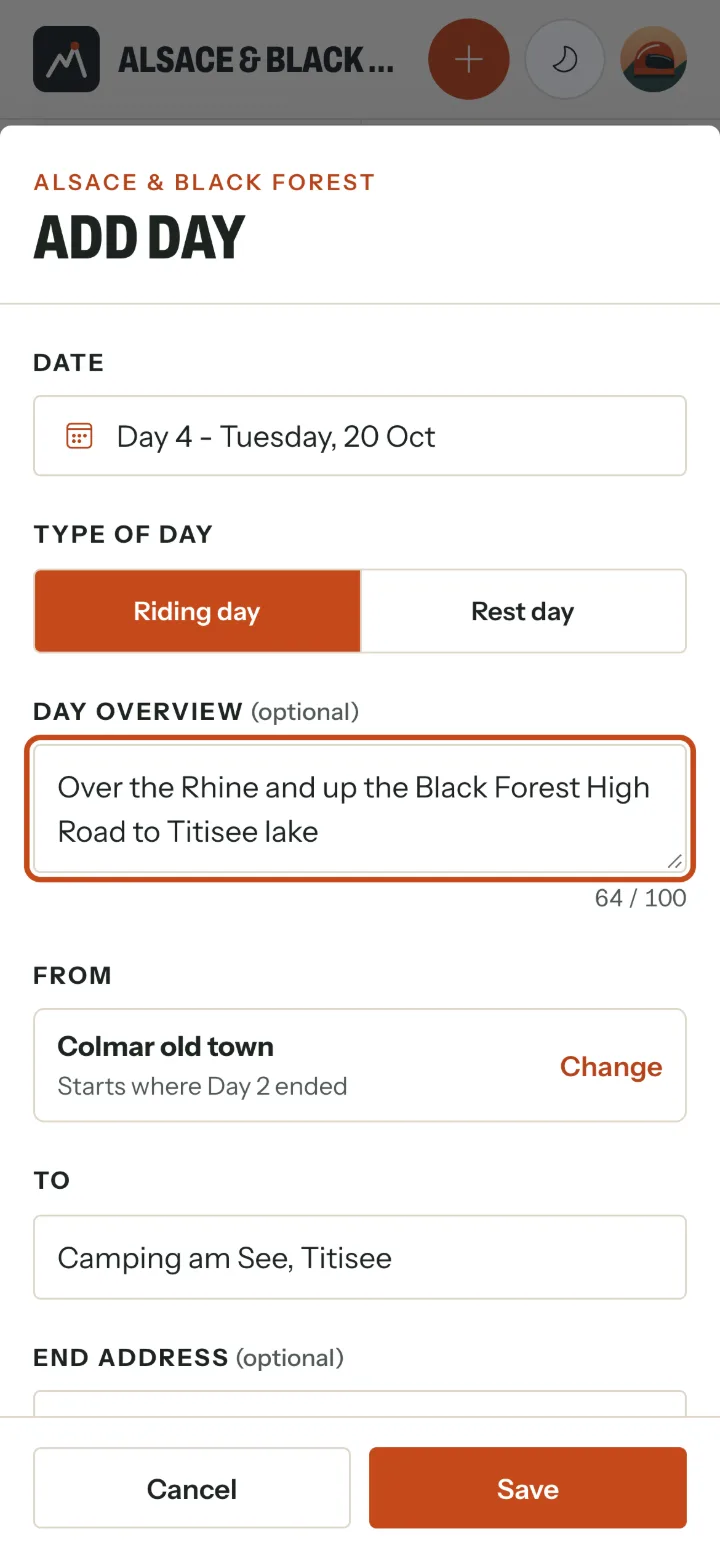
- Choose Add day, then the date from the trip's days.
- Add a day overview if you like - one line on the plan (up to 100 characters).
- From fills itself in from where the day before ended, and To from that night's stay. Otherwise type a place and an address and choose Check location, or Pick on map.
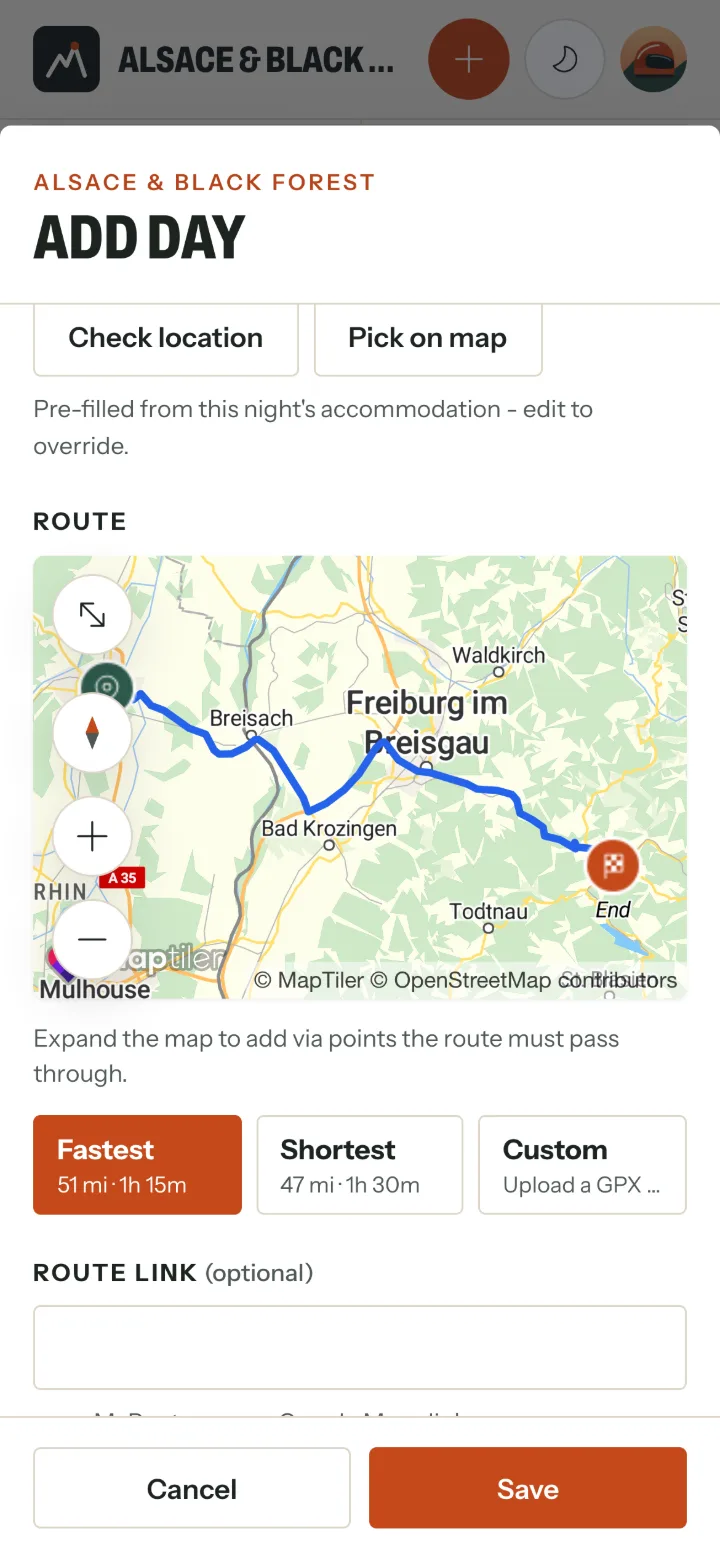
Choose the route
As soon as the start and end are found, the route is worked out. Pick Fastest or Shortest - each shows its distance and time - or Custom to upload a GPX file from your own route planner.
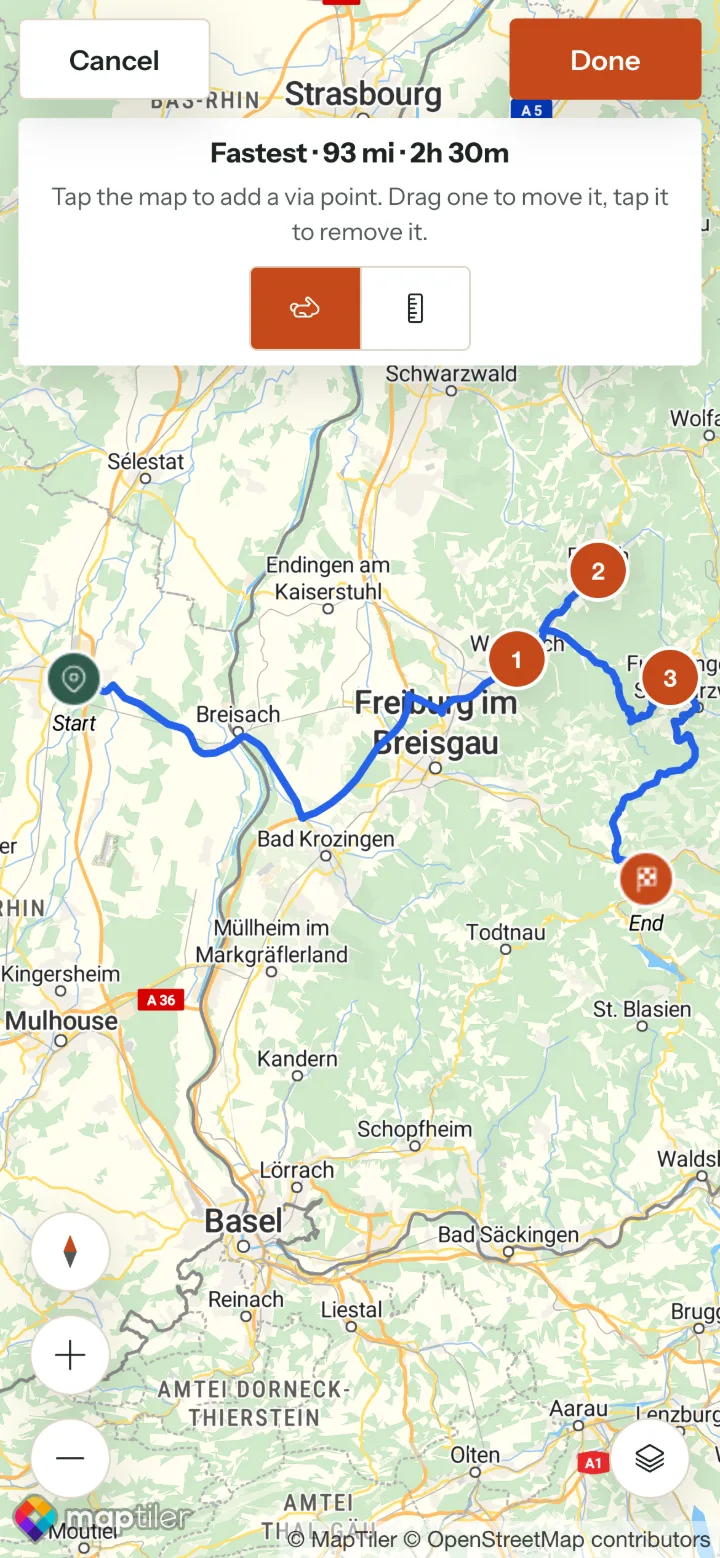
Shape it with via points
Expand the map and tap it to add a via point the route must pass through - up to 25. Drag one to move it; tap it to remove it. The hare and ruler switch between Fastest and Shortest.
Done keeps your changes; Cancel puts it back as it was.
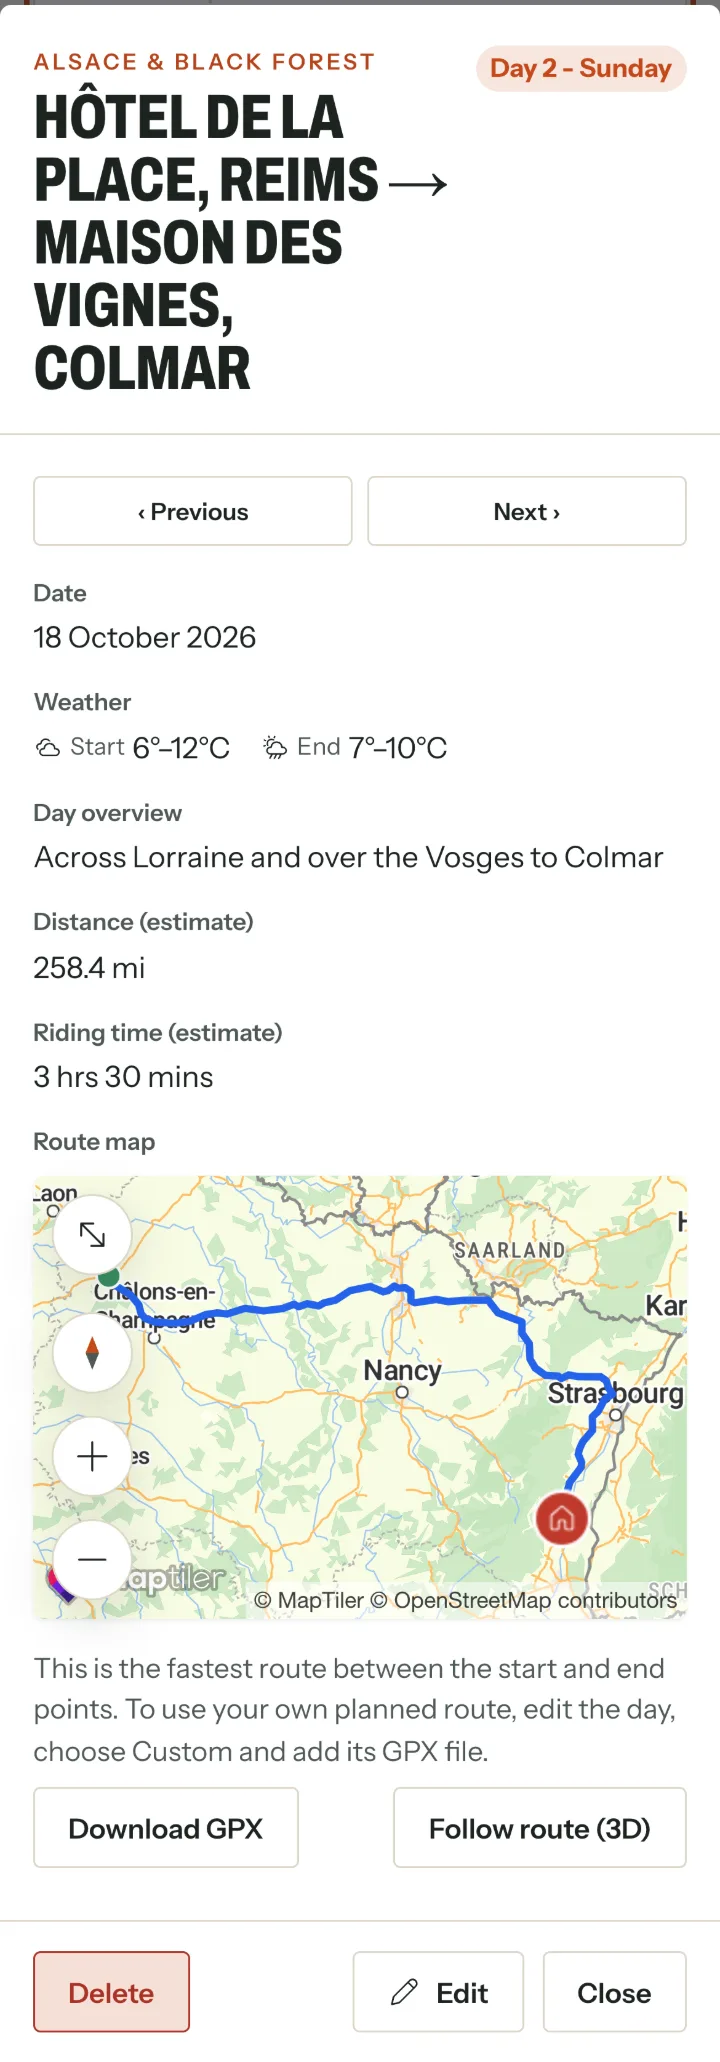
A day at a glance
Opening a day shows its date, the weather at the start and end, the overview, distance and riding time, and the route map with tonight's stay.
- Download GPX - the route for your satnav or phone app.
- Follow route (3D) - a satnav-style view on the day (see On the road).
- Previous / Next - step through the days.
Rest days
For a day off the bikes, choose Rest day instead of Riding day. It shows in green in the itinerary, with its overview and the weather, and has no route.
4. Stays
3 steps
Organisers add the stays; everyone sees where they're sleeping.
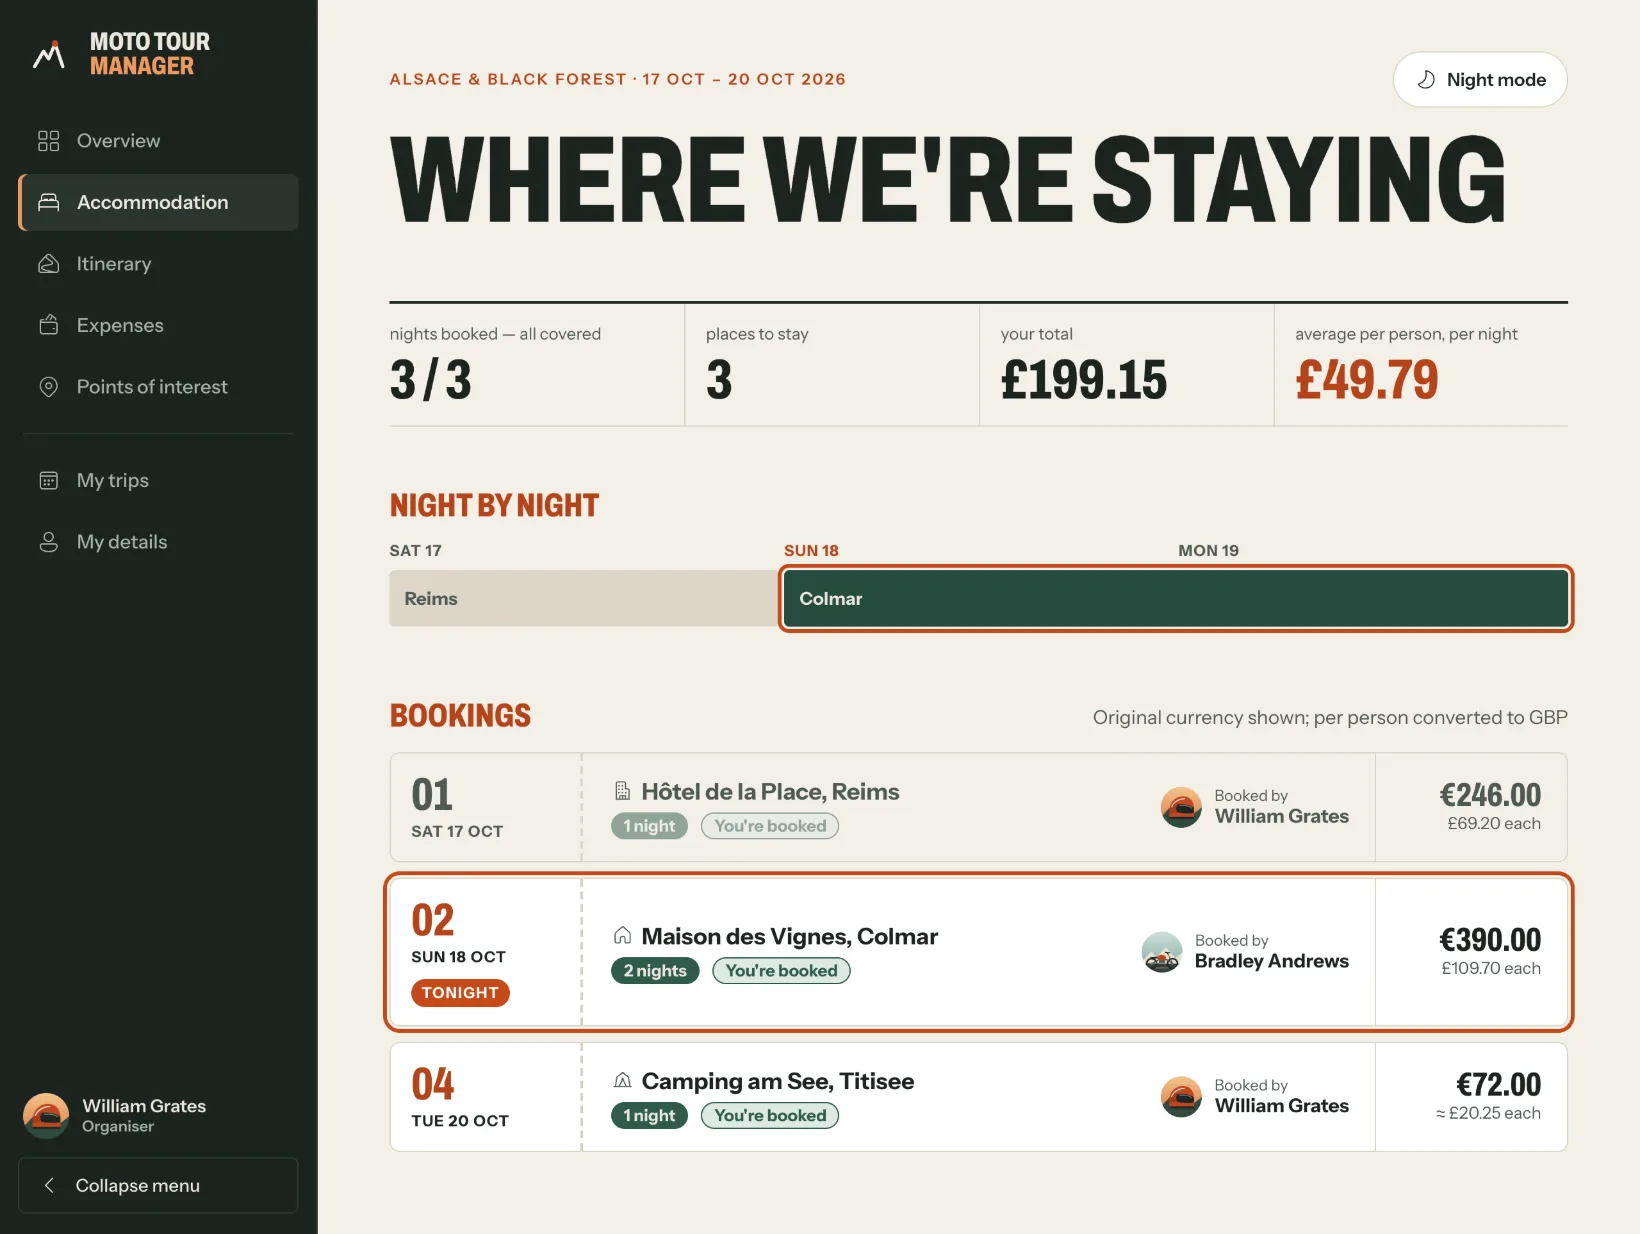
Where we're staying
How many nights are booked, your share of the cost and the average per person per night, then each night's stay at a glance and the bookings - who booked each one, the price and the cost each.
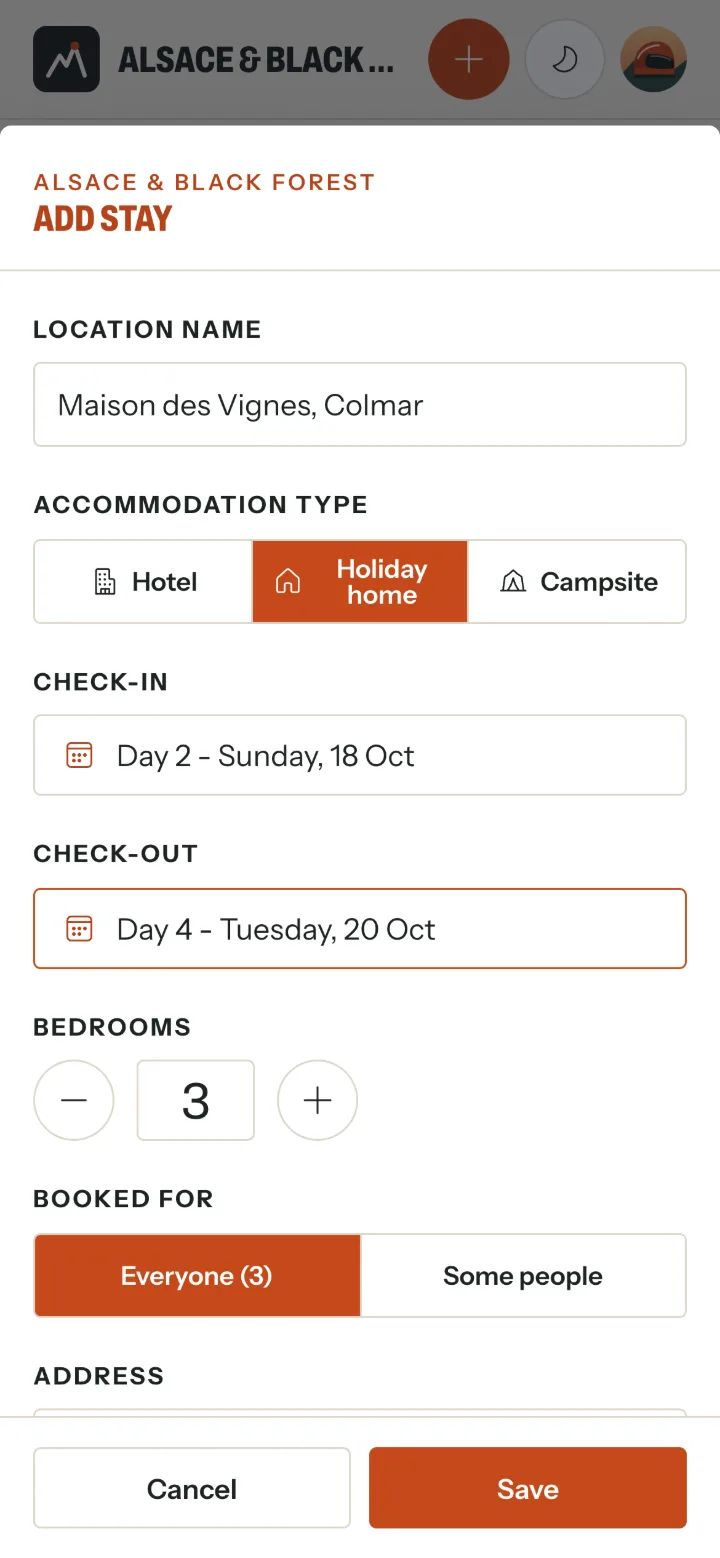
Add a stay
- The name and type - hotel, holiday home or campsite.
- Check-in and check-out, from the trip's days.
- Rooms (bedrooms for a holiday home, pitches for a campsite).
- Booked for everyone, or just some people.
- The address - choose Check location, then Use this location.
- The price and who booked it. It goes into the kitty as an expense by itself.
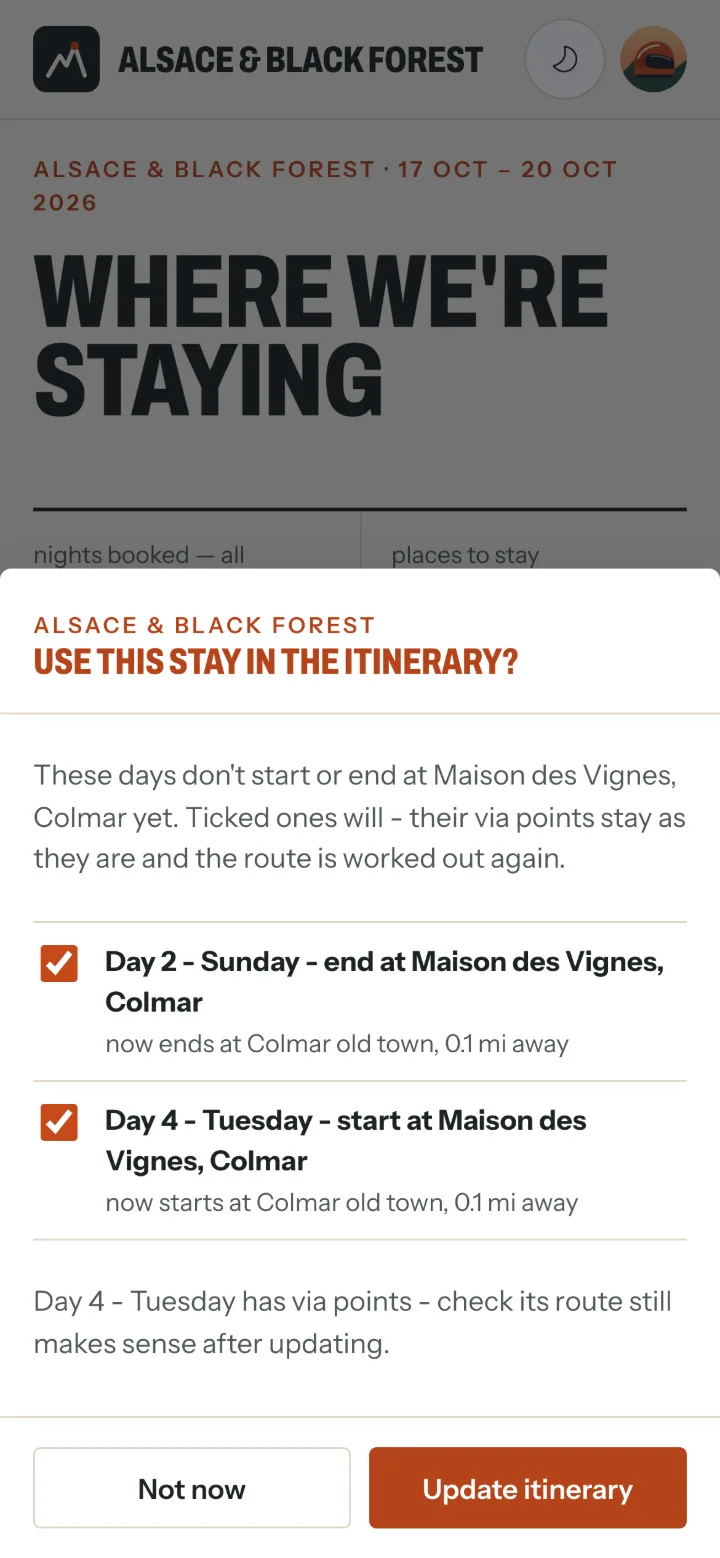
Put the stay in the itinerary
If days end or start near the stay but not at it, saving offers to put it in: tick the days to change and choose Update itinerary. Their routes are worked out again.
5. Points of interest
2 steps
Everyone can add the cafés, viewpoints and passes worth a detour.
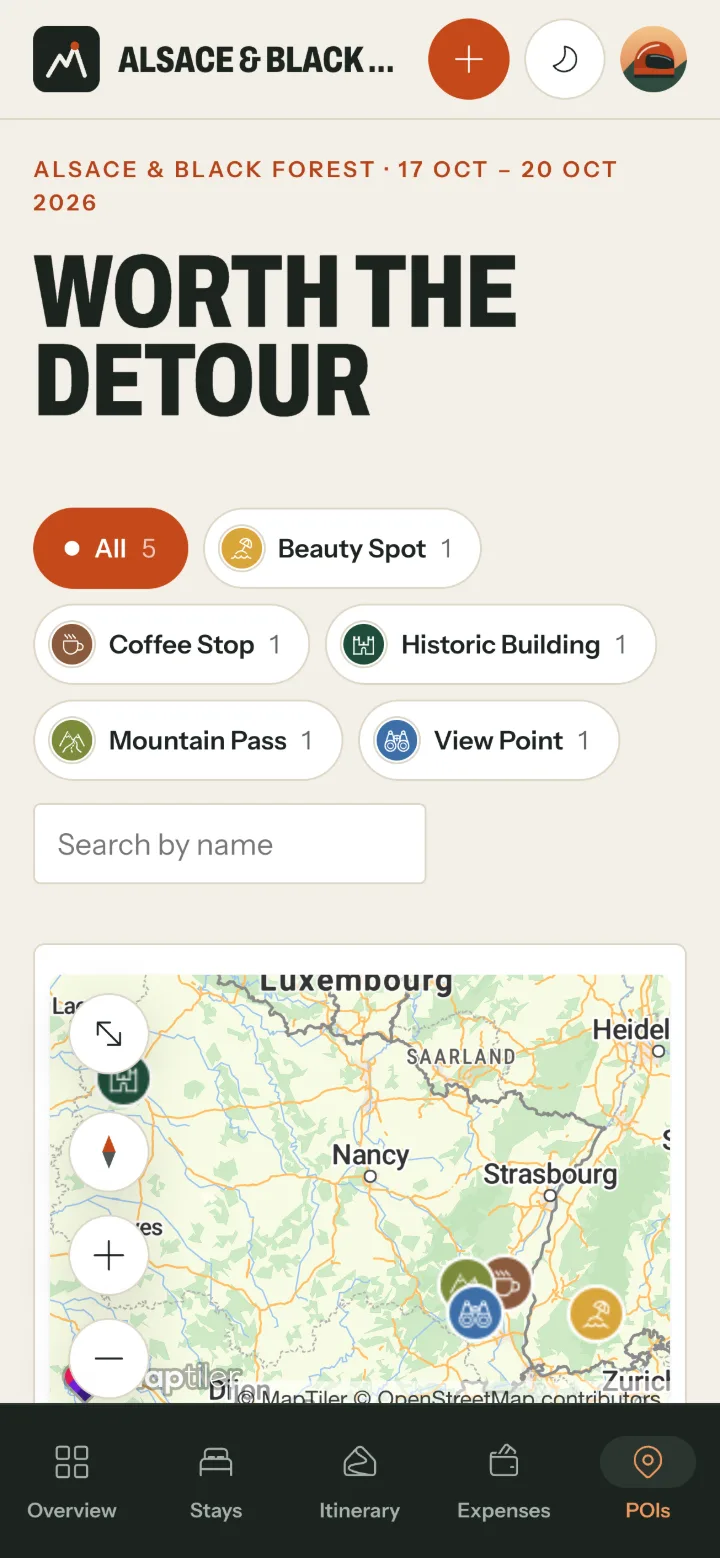
Worth the detour
Every point on the map and in a list below it. Narrow the list by type or search by name; tap one to show it on the map with its note.
Add a point of interest
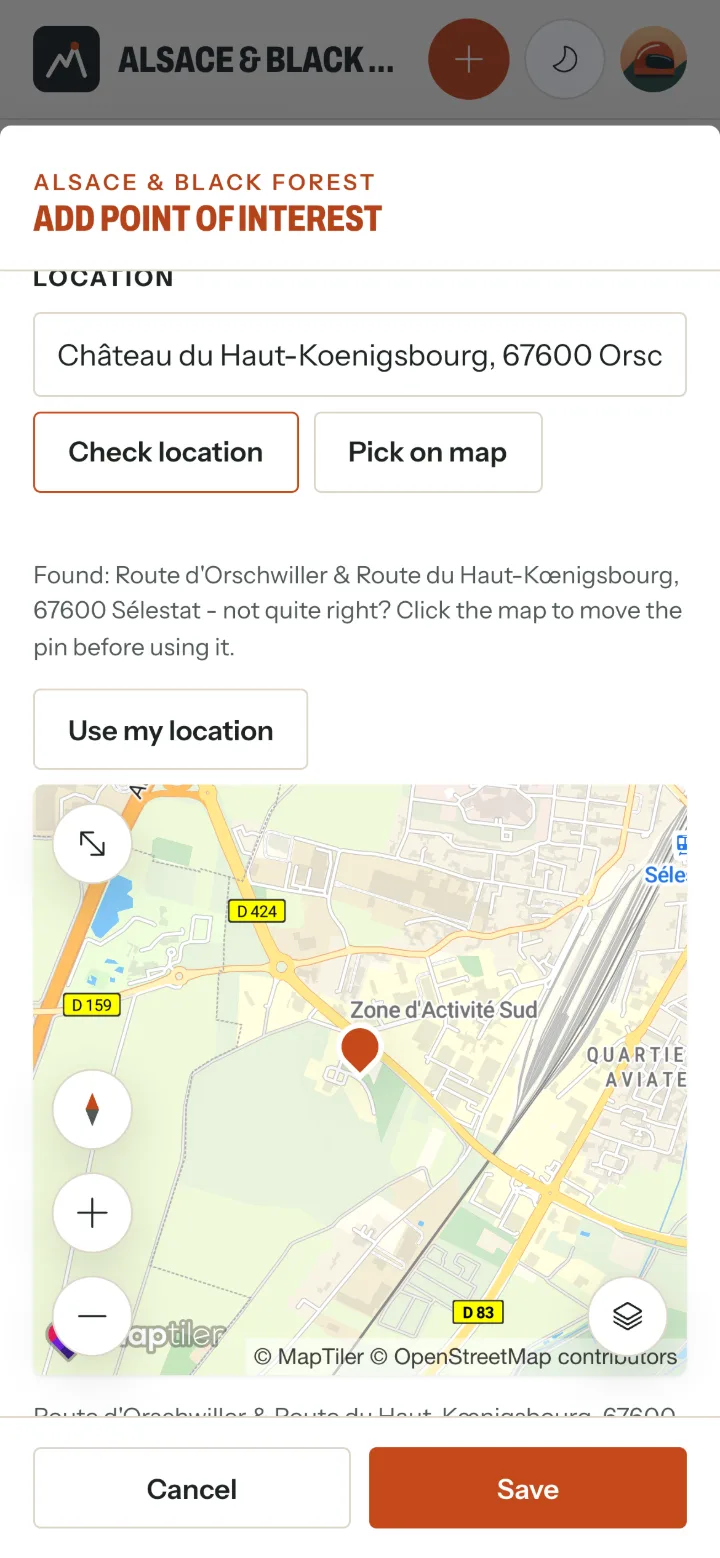
- Choose Add point of interest (the + on a phone), give it a name and a type, and say why it's worth the detour.
- For the location, type a place or address and choose Check location, or Pick on map (it opens on the trip), or Use my location if you're standing there.
- Not quite right? Tap the map to move the pin, then Use this location and Save.
6. Expenses and settling up
10 steps
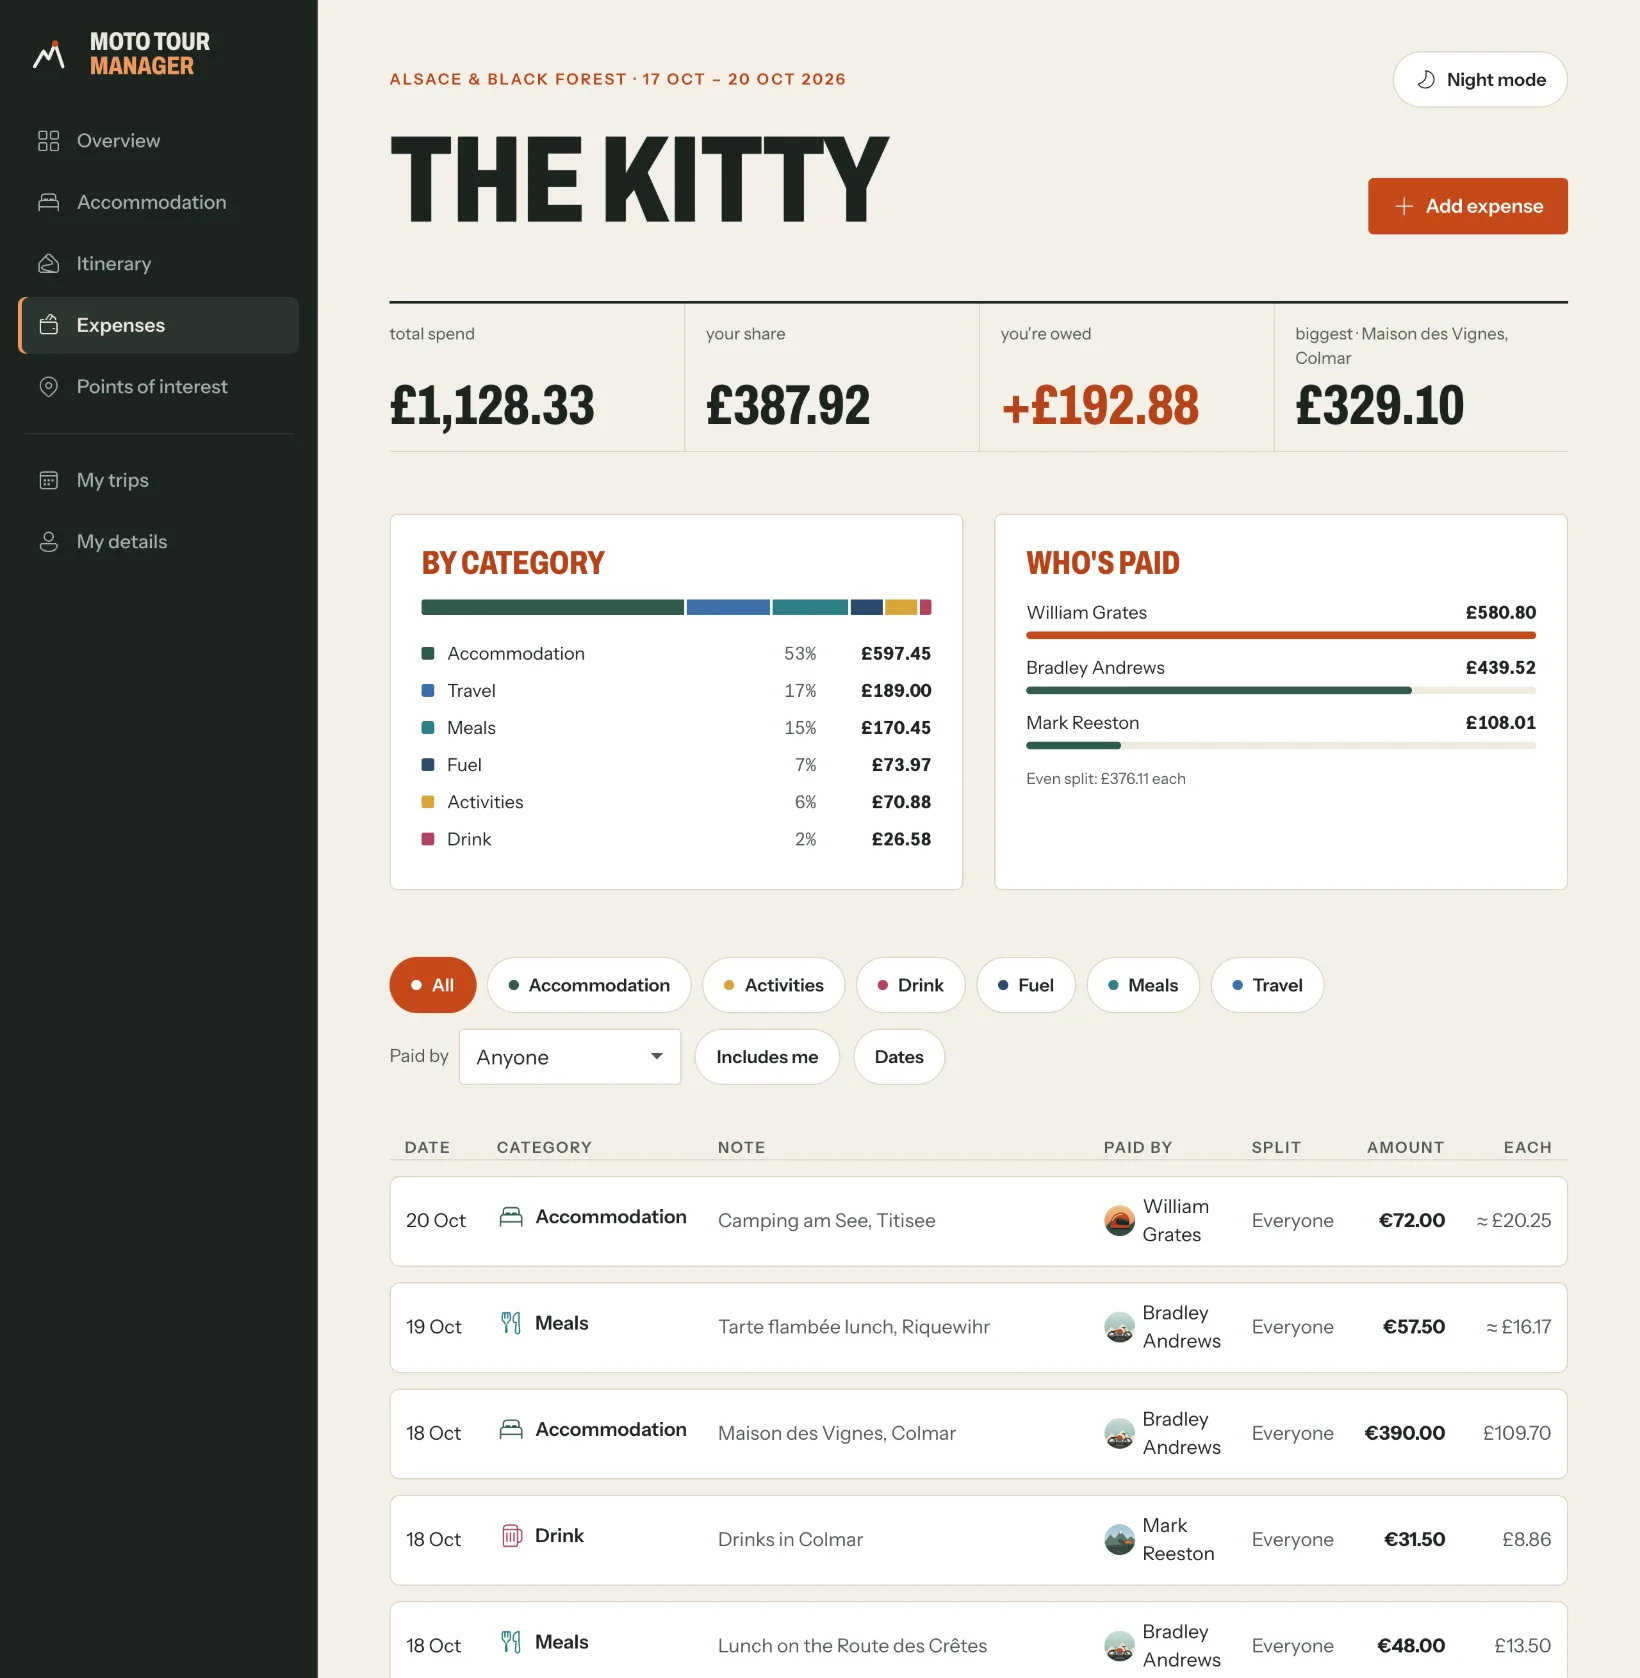
One shared kitty: everyone adds what they pay for, and at the end it works out who owes whom.
The kitty
The total spent, your share and what you're owed (or owe), spending by category and who's paid what. Below, every expense with each person's share - converted to your home currency when it was paid in another.
Add an expense
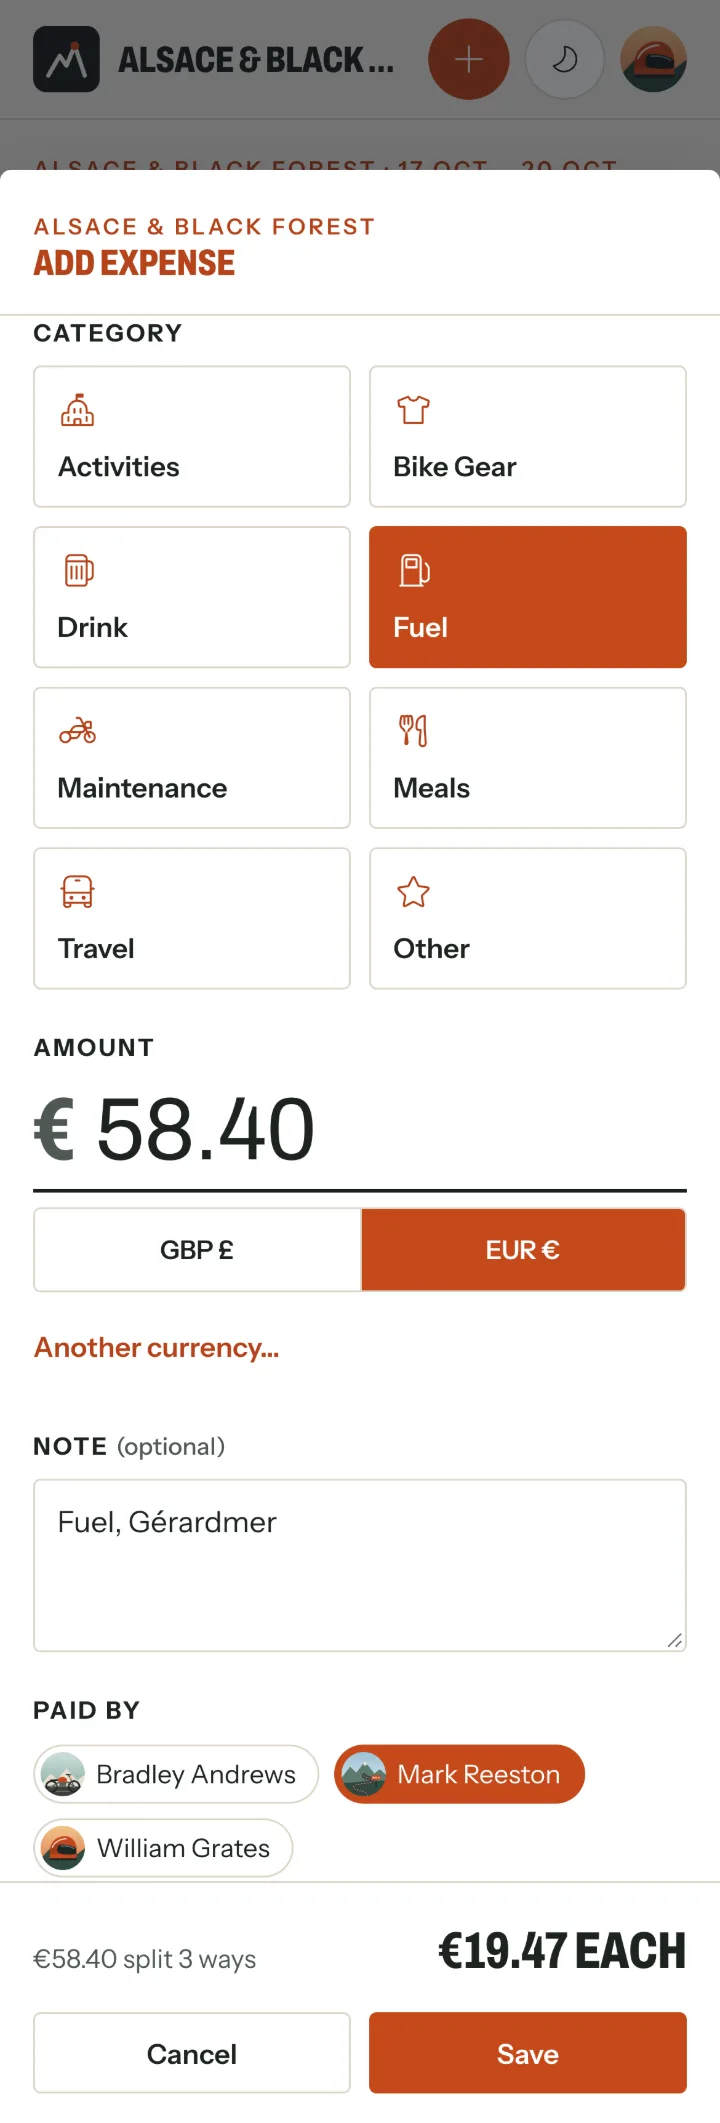
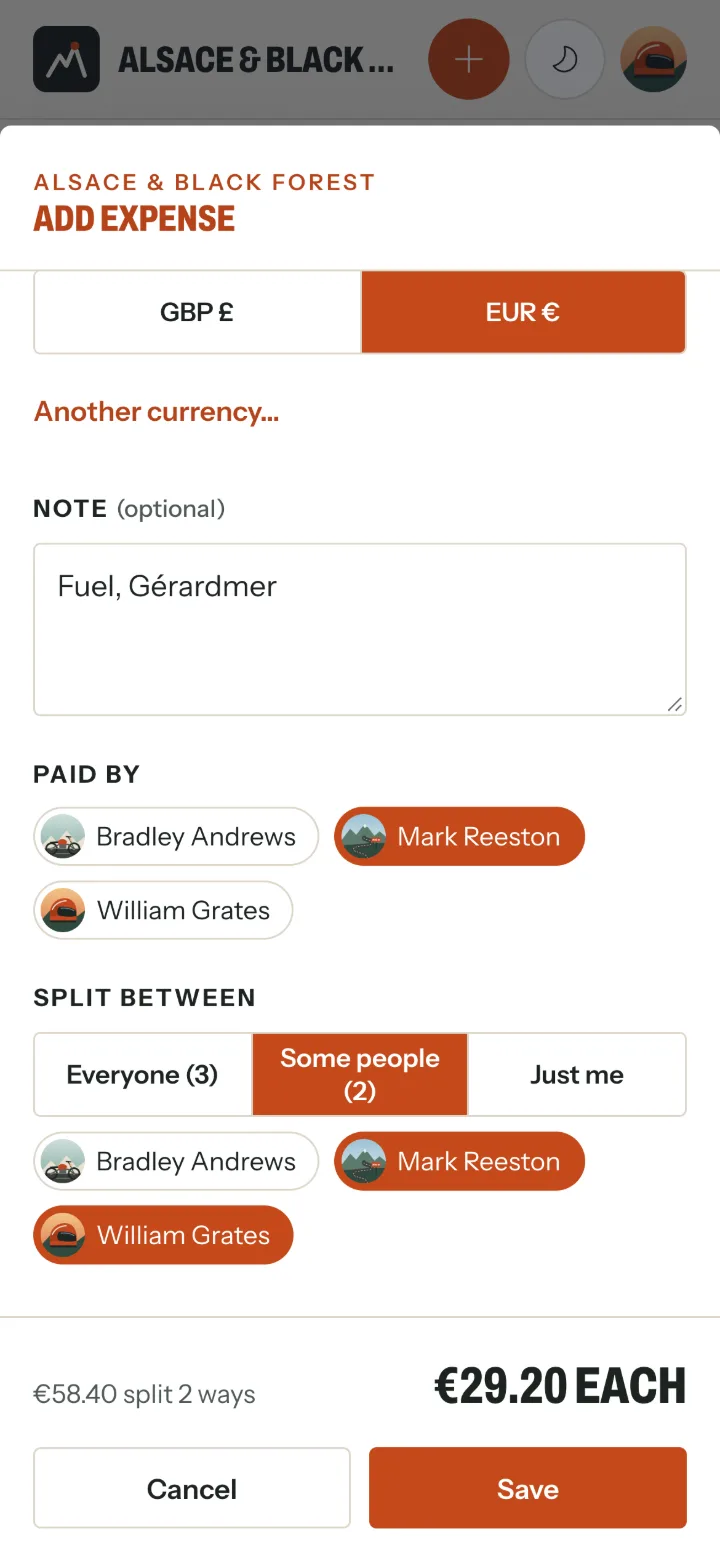
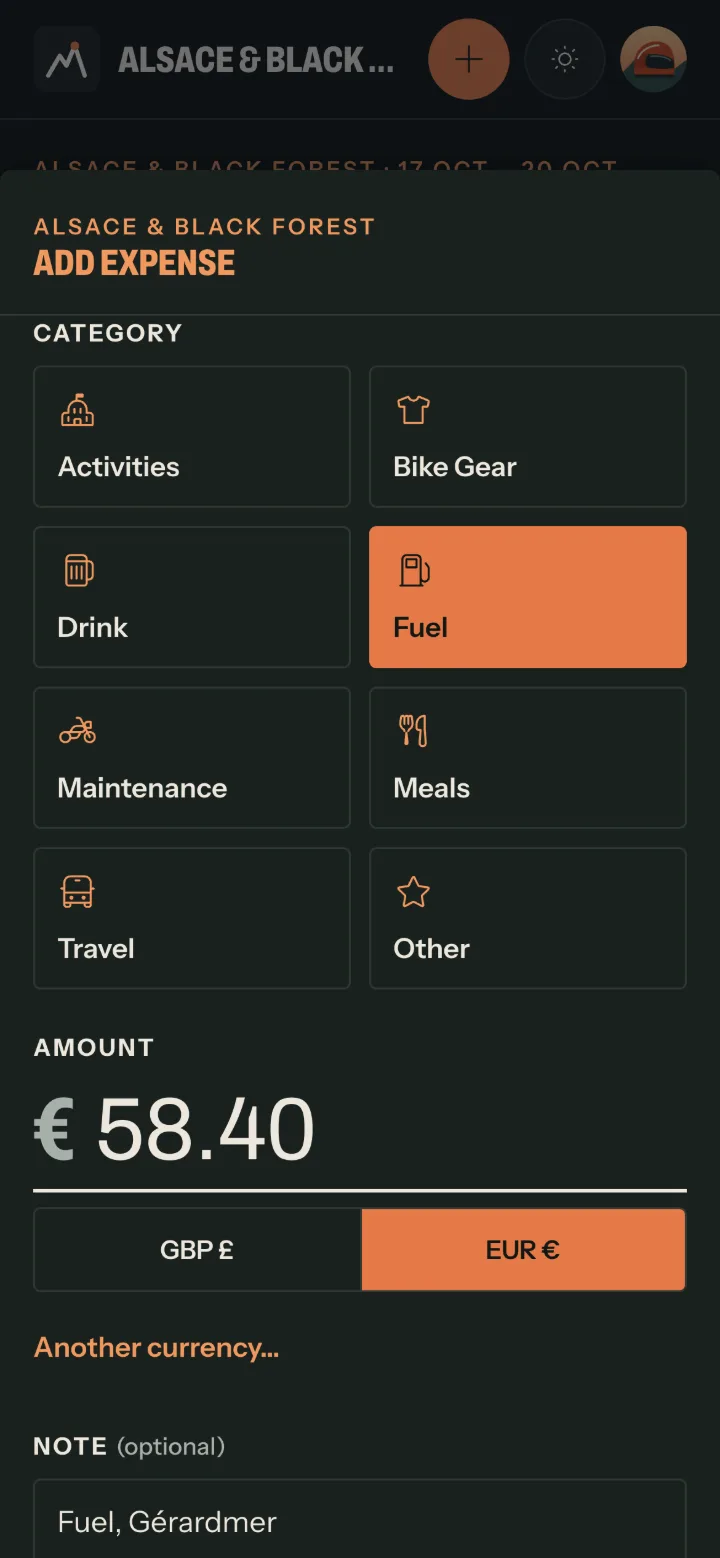
Choose Add expense, then the category, the amount and its currency, and a note.
Organisers also see Paid by, to record something someone else paid for. Everyone else records what they paid themselves.
Split between some people
Not everyone had a share? Under Split between, choose Some people and pick who - or Just me. Each share updates as you go.
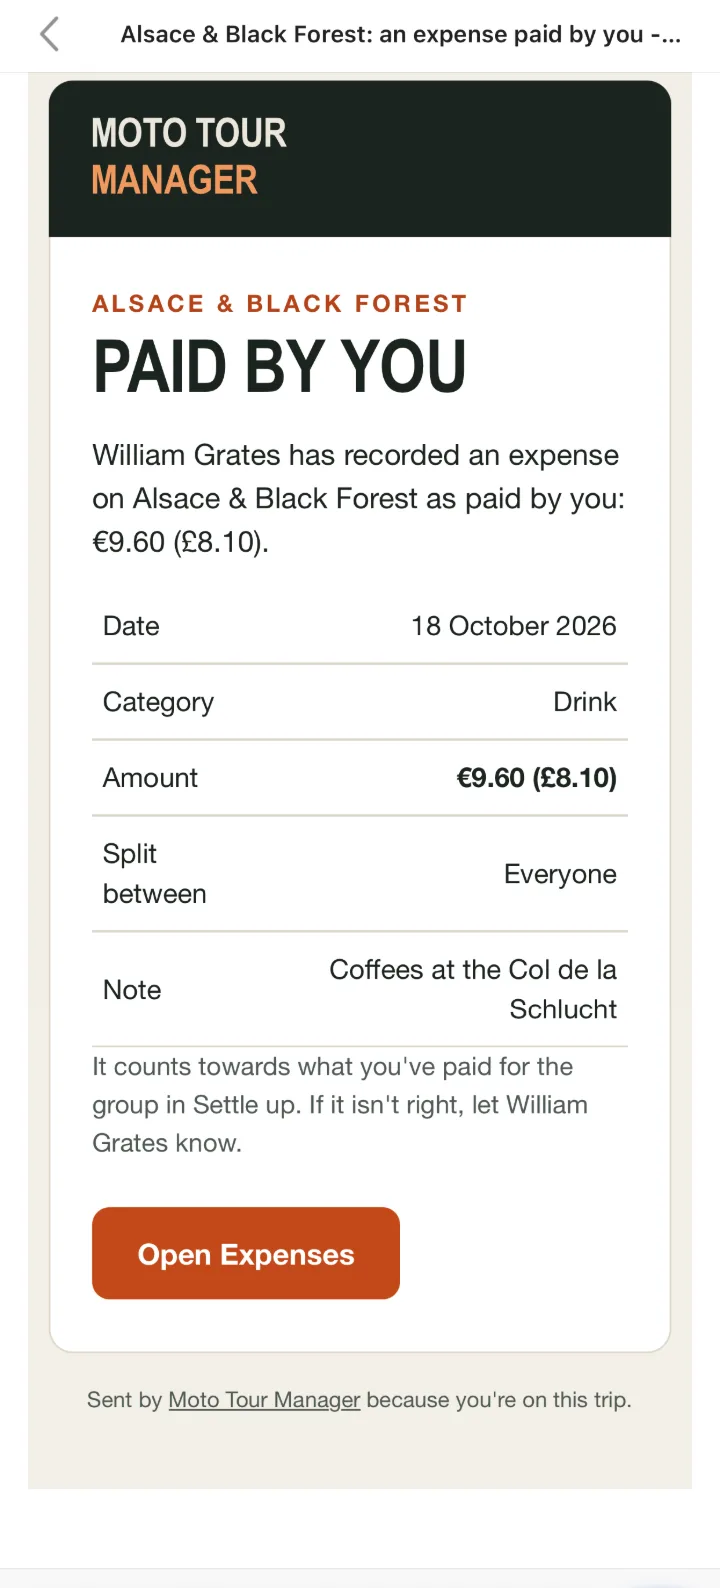
"Paid by you" emails
When an organiser records an expense as paid by you, you get an email, so nothing lands in your kitty unnoticed. If it isn't right, tell the organiser.
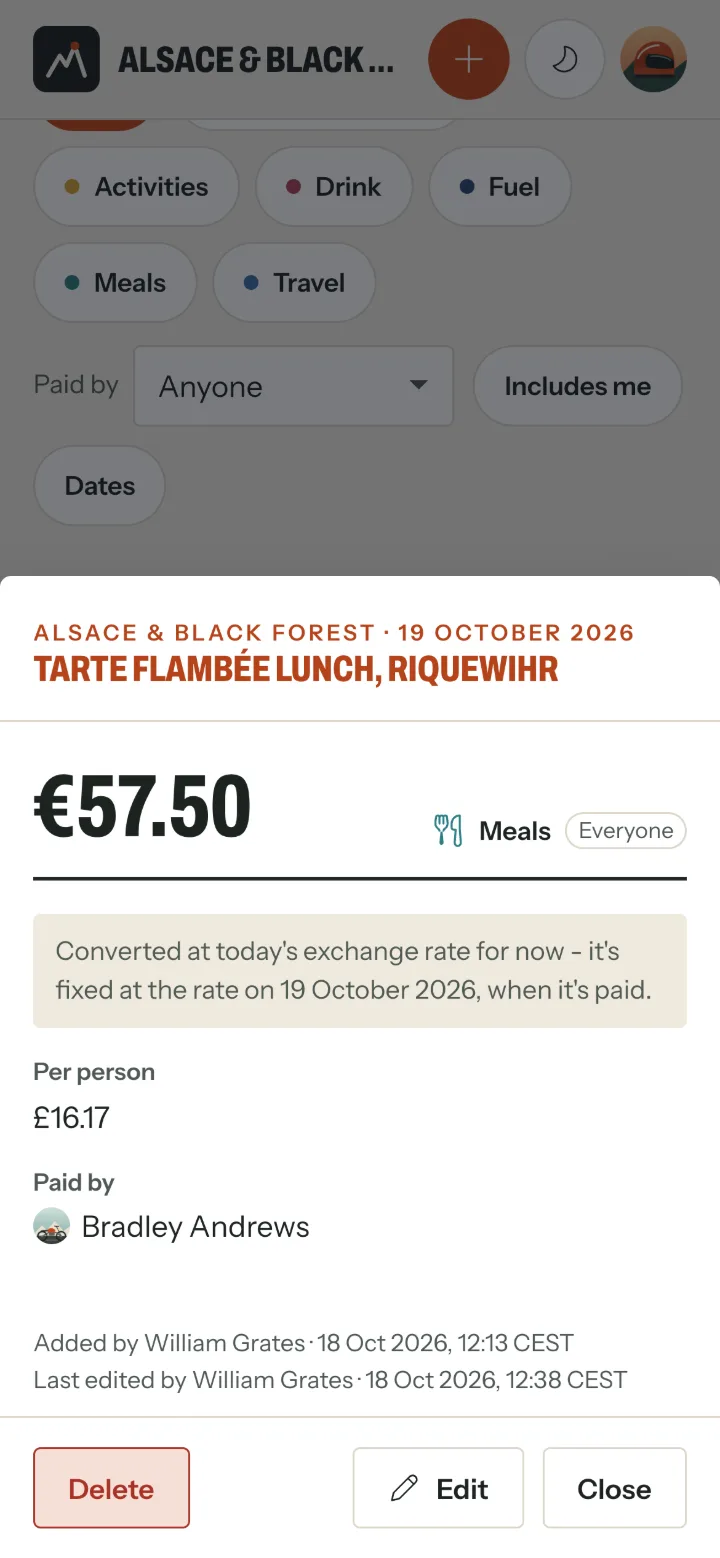
Who added it
Every expense shows who added it and who last changed it, and when. The person who added it, or an organiser, can Edit or Delete it.
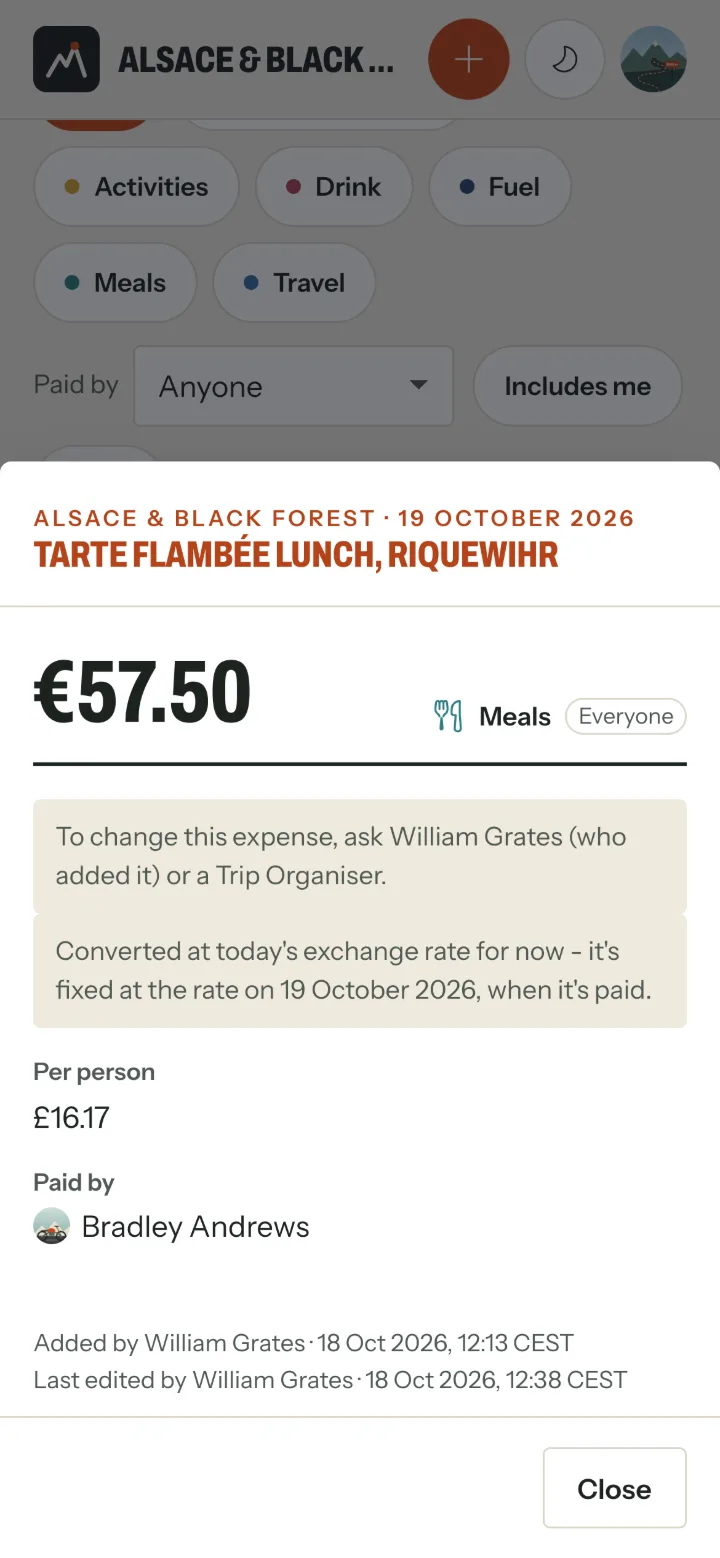
Someone else's expense
Anyone else sees who to ask instead of an Edit button.
Settle up
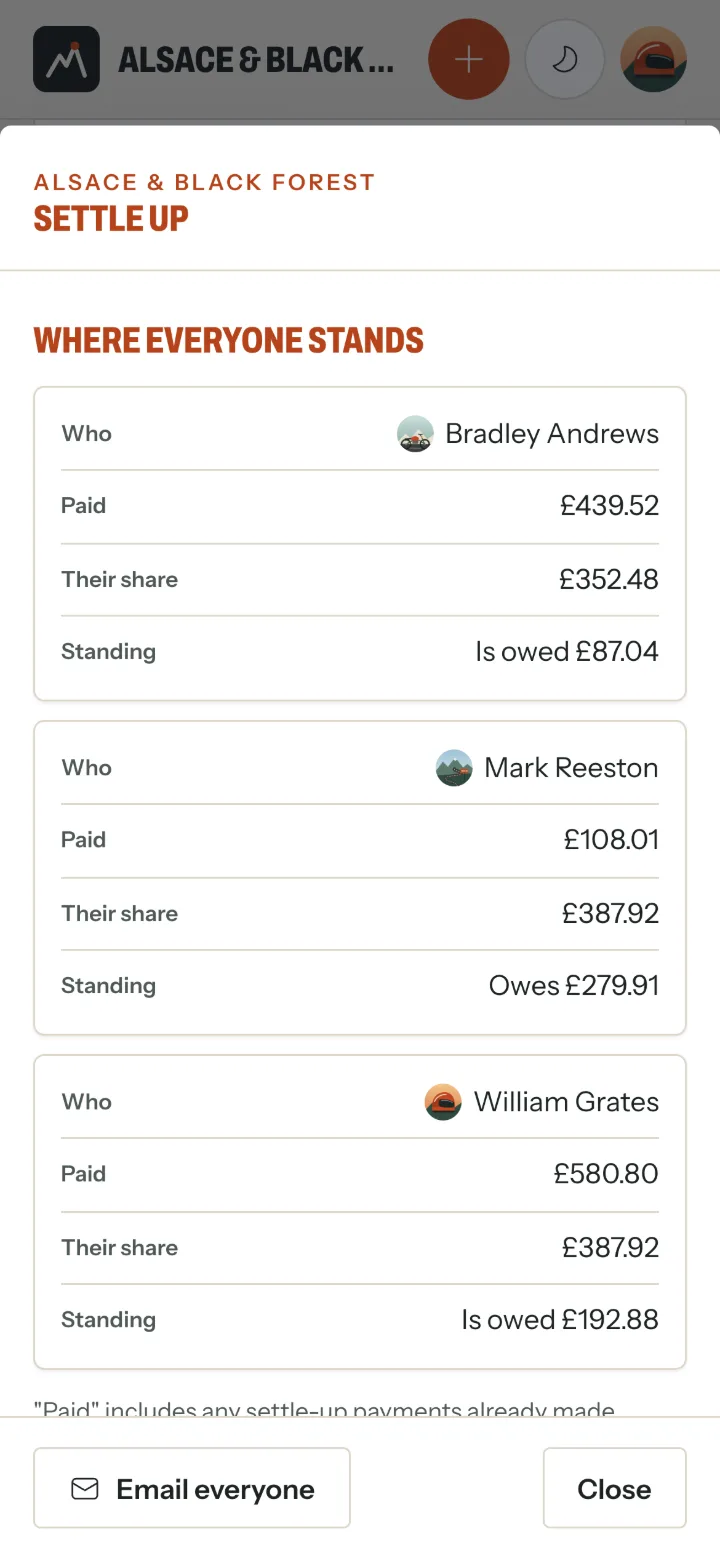
Choose Settle up on the Expenses page. Where everyone stands shows what each person has paid, their share, and whether they're owed or owe.
Below it, the payments that square everyone up - as few as possible, so you may pay someone other than whoever covered your costs. Email everyone sends each person their breakdown.
Mark the trip complete
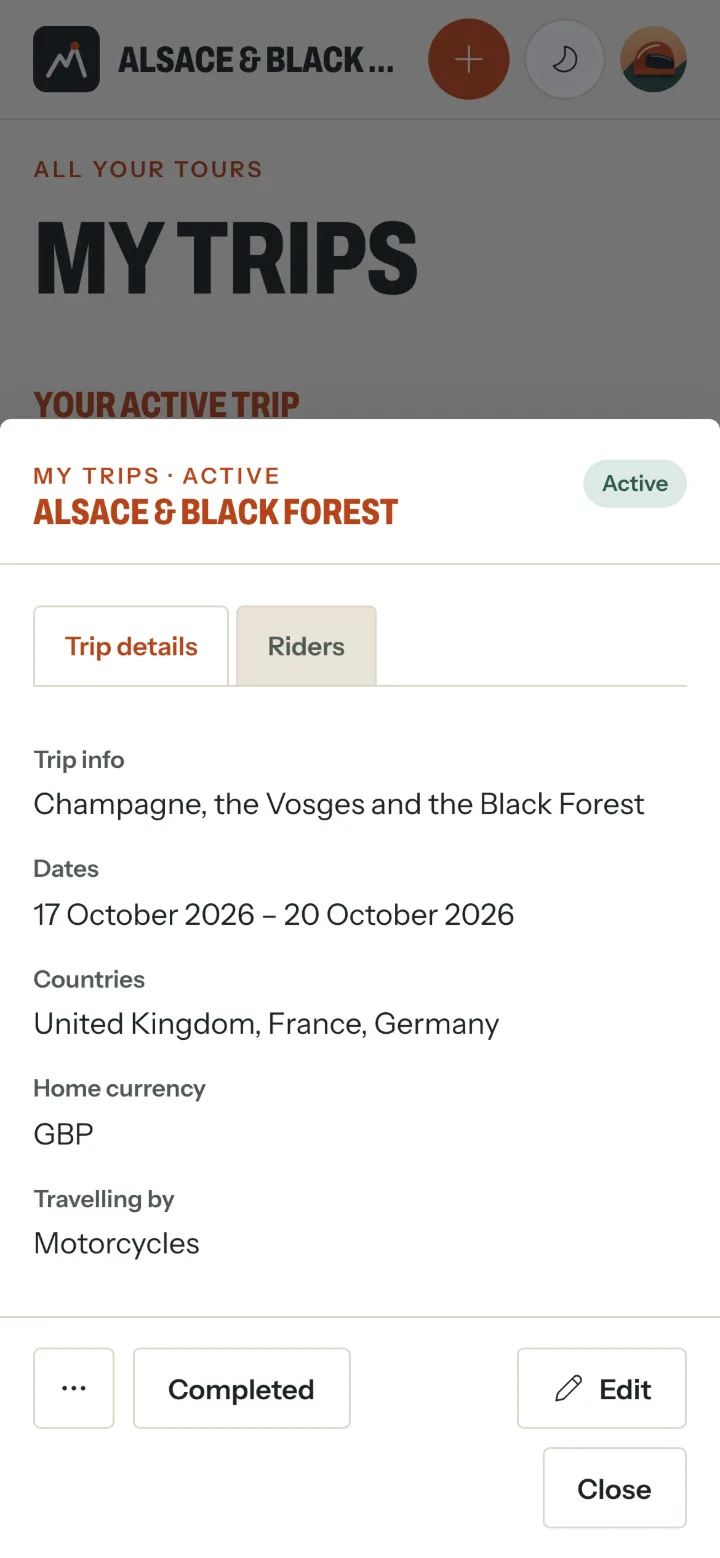
Organisers At the end of the trip, open it in My trips and choose Mark complete (Completed on a phone).
Everyone is emailed their final settle-up breakdown, and members can no longer add or change anything - only look and settle up. Organisers can still change anything, and can reopen it.
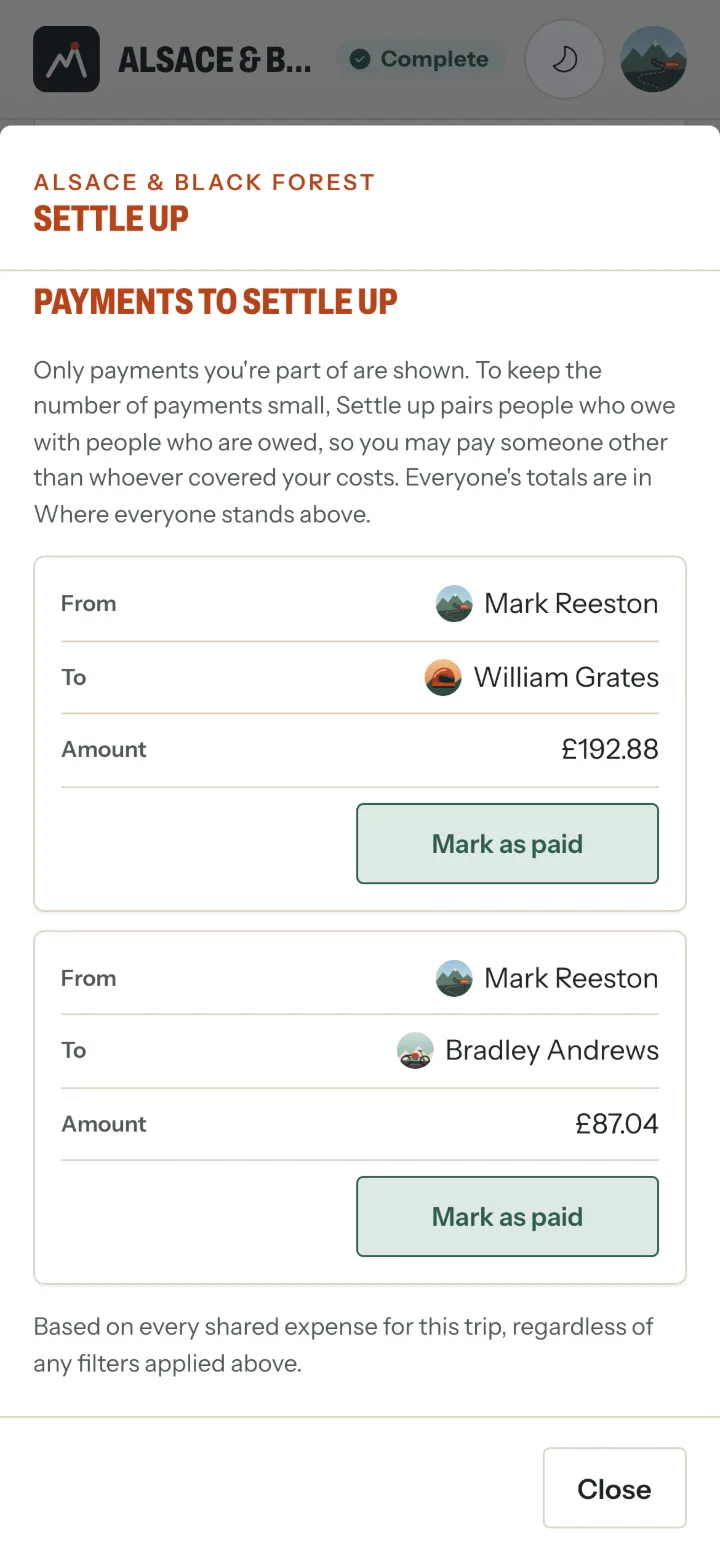
Mark your payment as paid
Once the trip's complete, pay what you owe (by bank transfer, say), then choose Mark as paid on that payment. The person you paid gets an email.
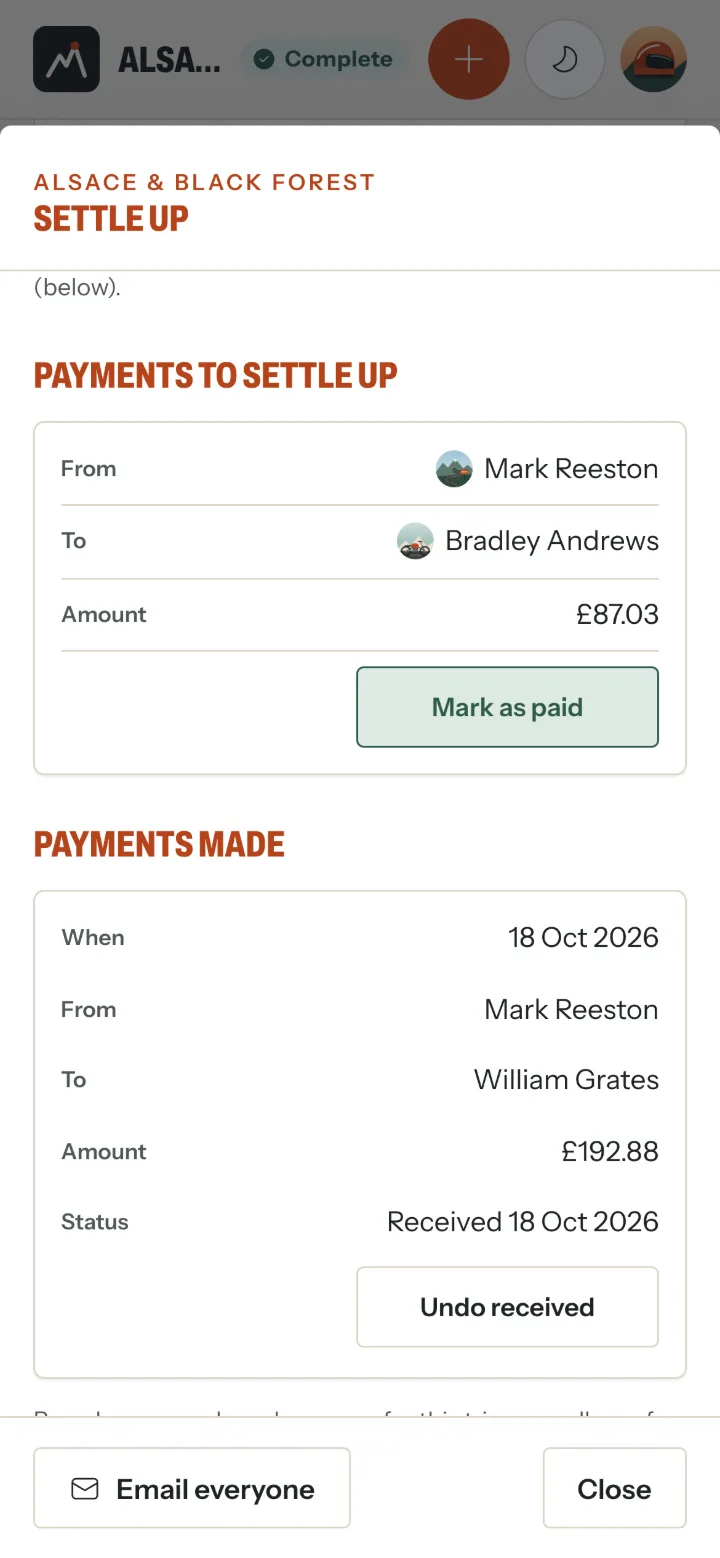
Confirm you've received it
The person who was paid chooses Mark as received, and the payment shows as received with the date. Either can be undone if it was a mistake.
7. On the road
5 steps
While the trip is under way.
The Overview
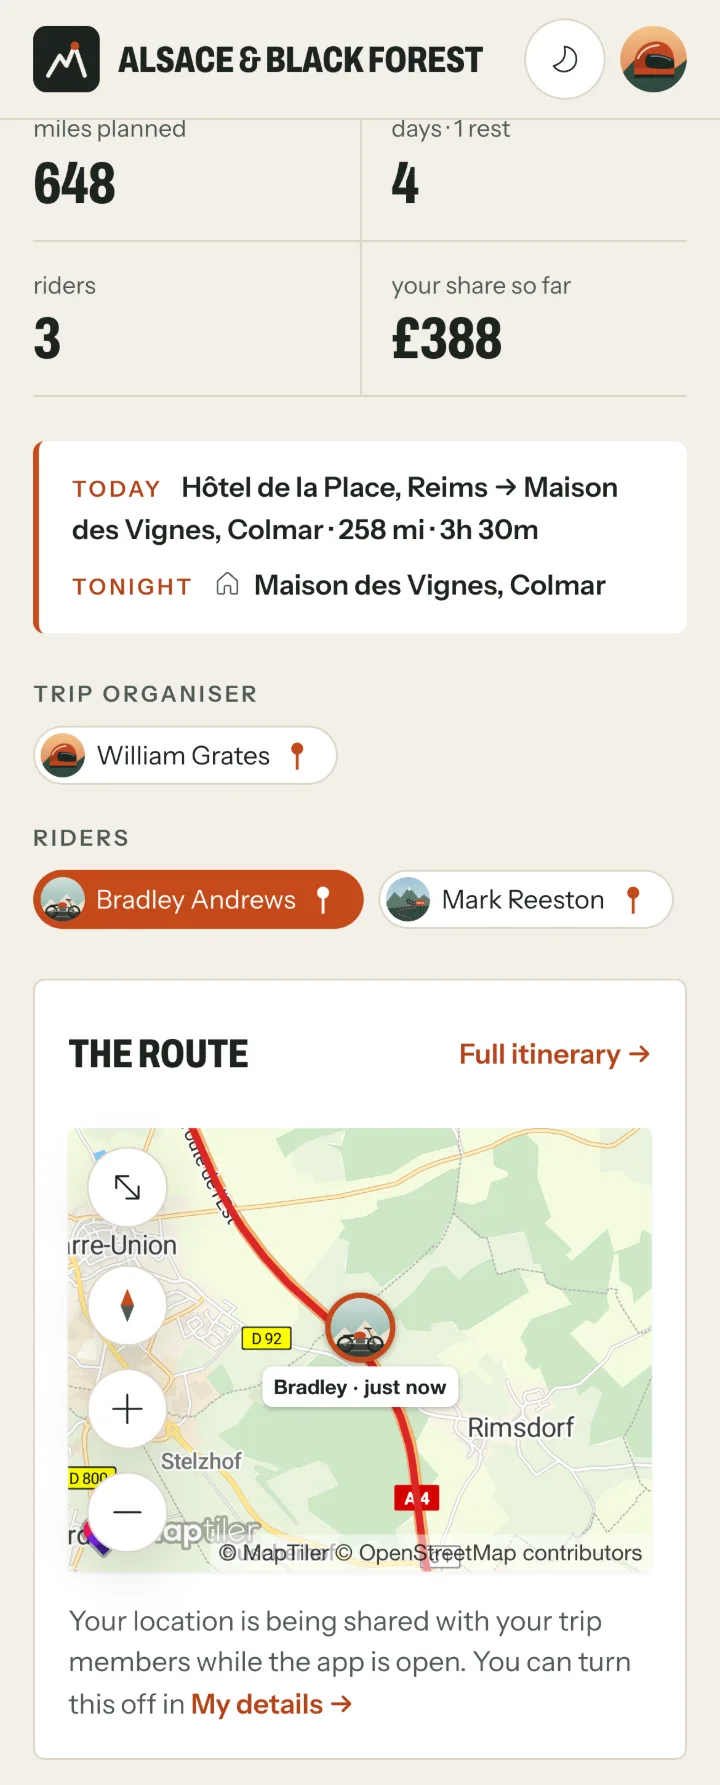
Today's day and tonight's stay at the top, then who's coming and the route map. Riders sharing their location show on the map as their photo - tap a name to find them.
Full-screen maps
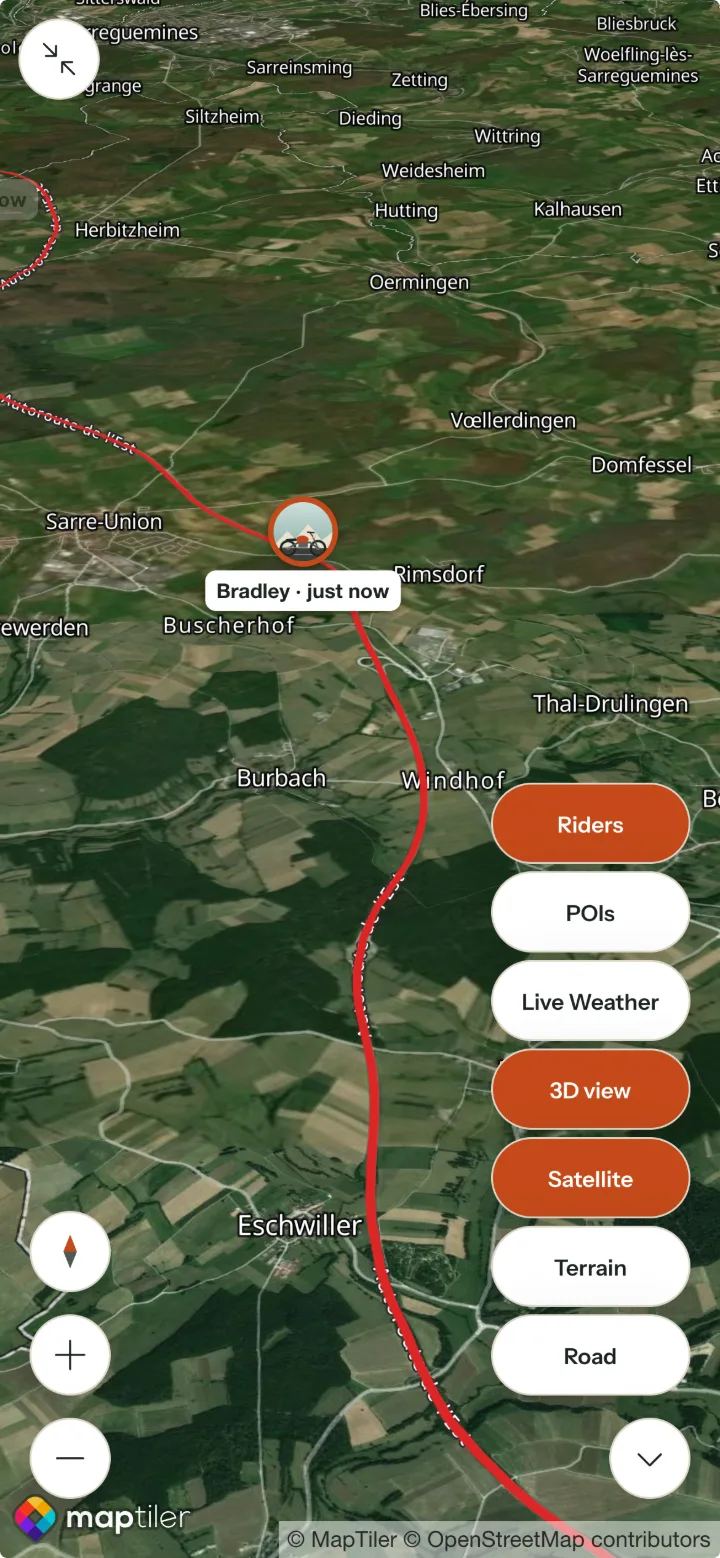
Expand any map to full screen. The round layers button at the bottom right opens the map's buttons:
- Road, Terrain or Satellite, and 3D view to raise the hills.
- Riders, POIs and Live Weather (rain radar) on or off.
Drag with two fingers to tilt the map.
Follow route
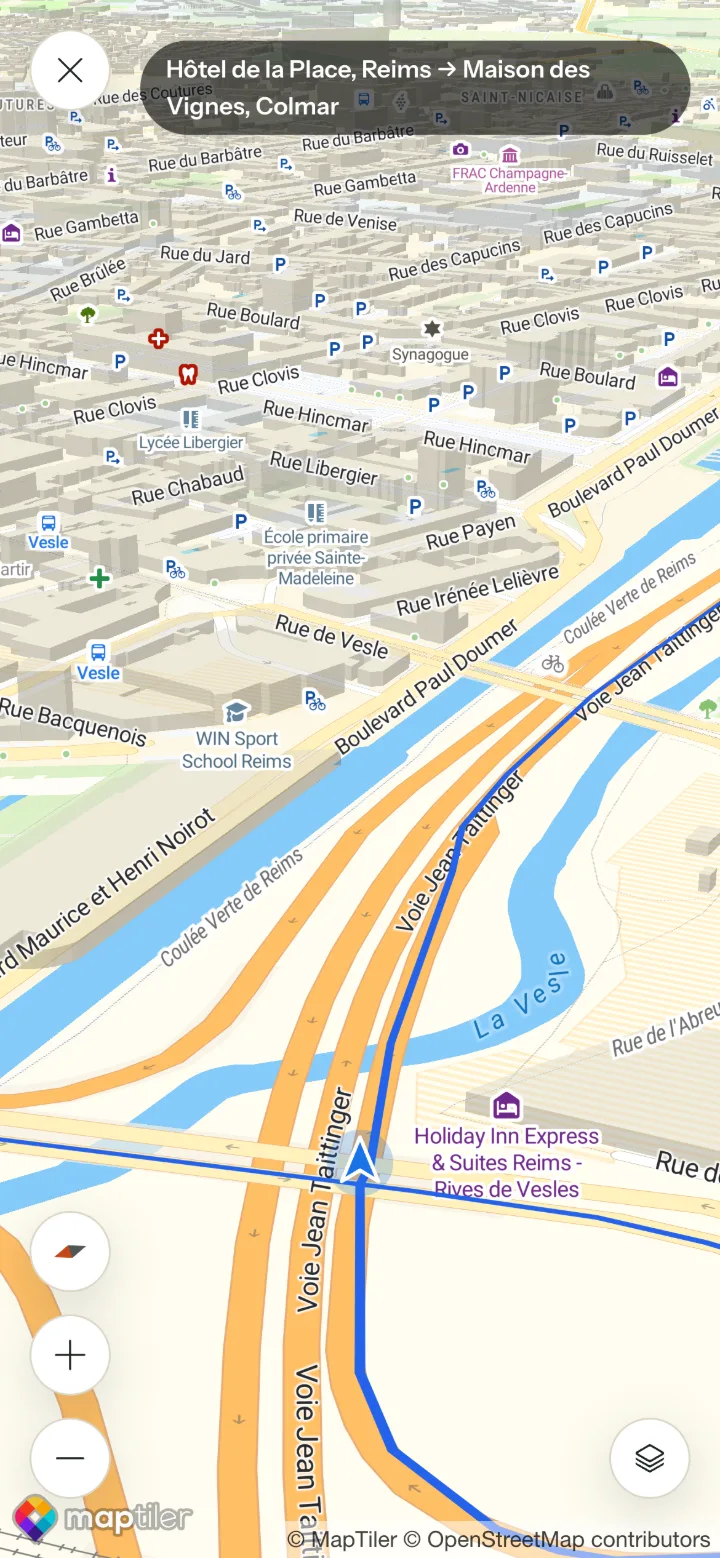
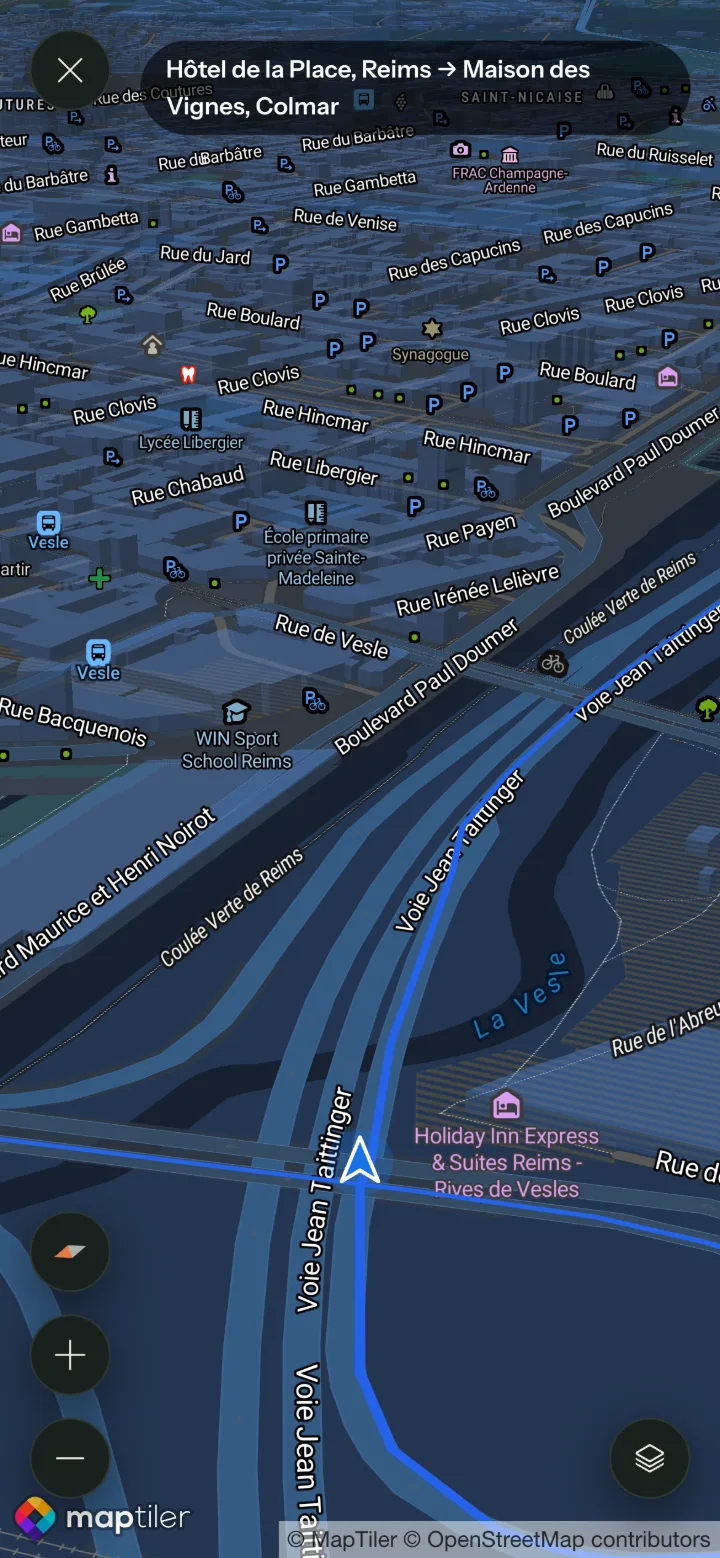
From a day's details, Follow route (3D) follows you along the day's route like a satnav, the road ahead turning with you. Drag to look around; Resume brings it back to you.
Share your location
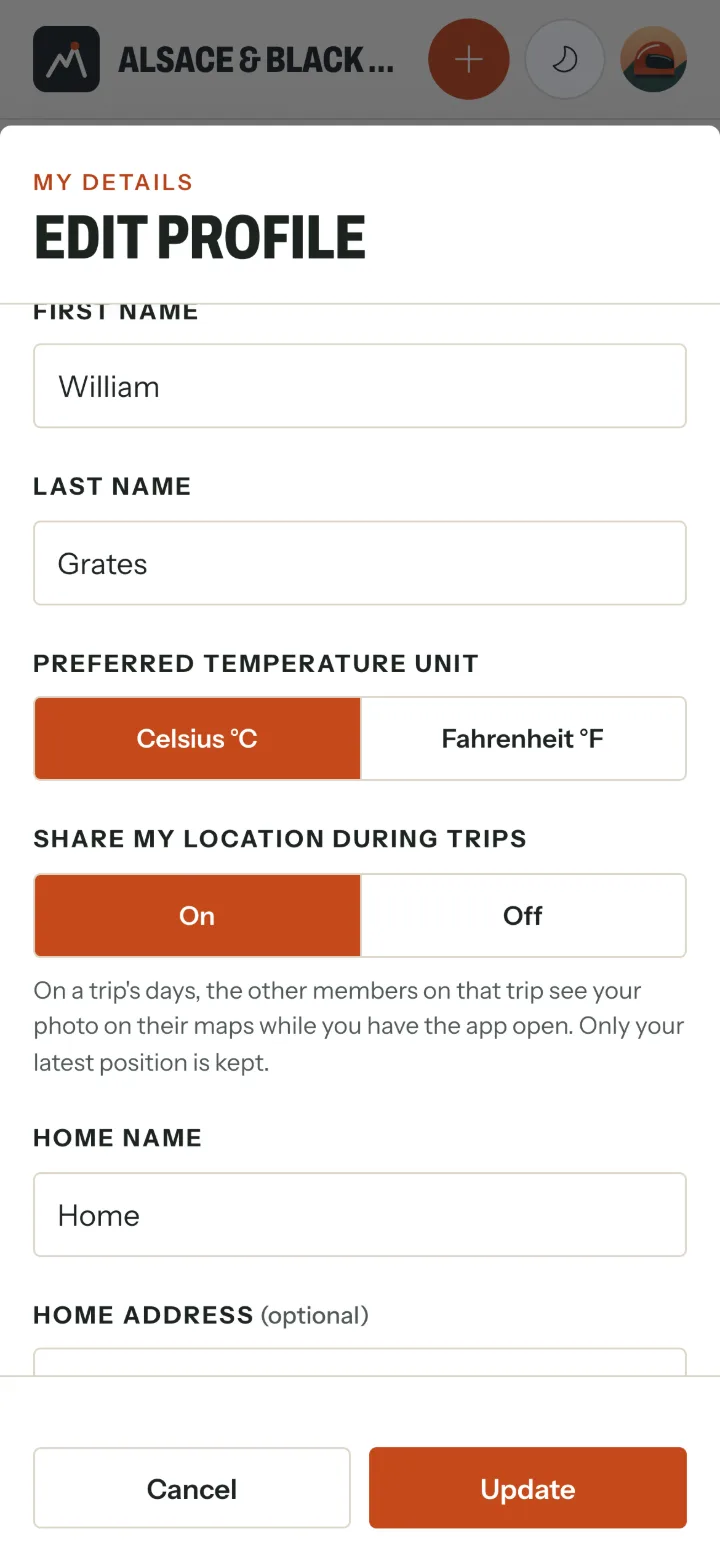
In My details, choose Edit on My profile and set Share my location during trips to On.
The others on the trip then see your photo on their maps - only on the trip's days, only while you have the app open, and only your latest position is kept.
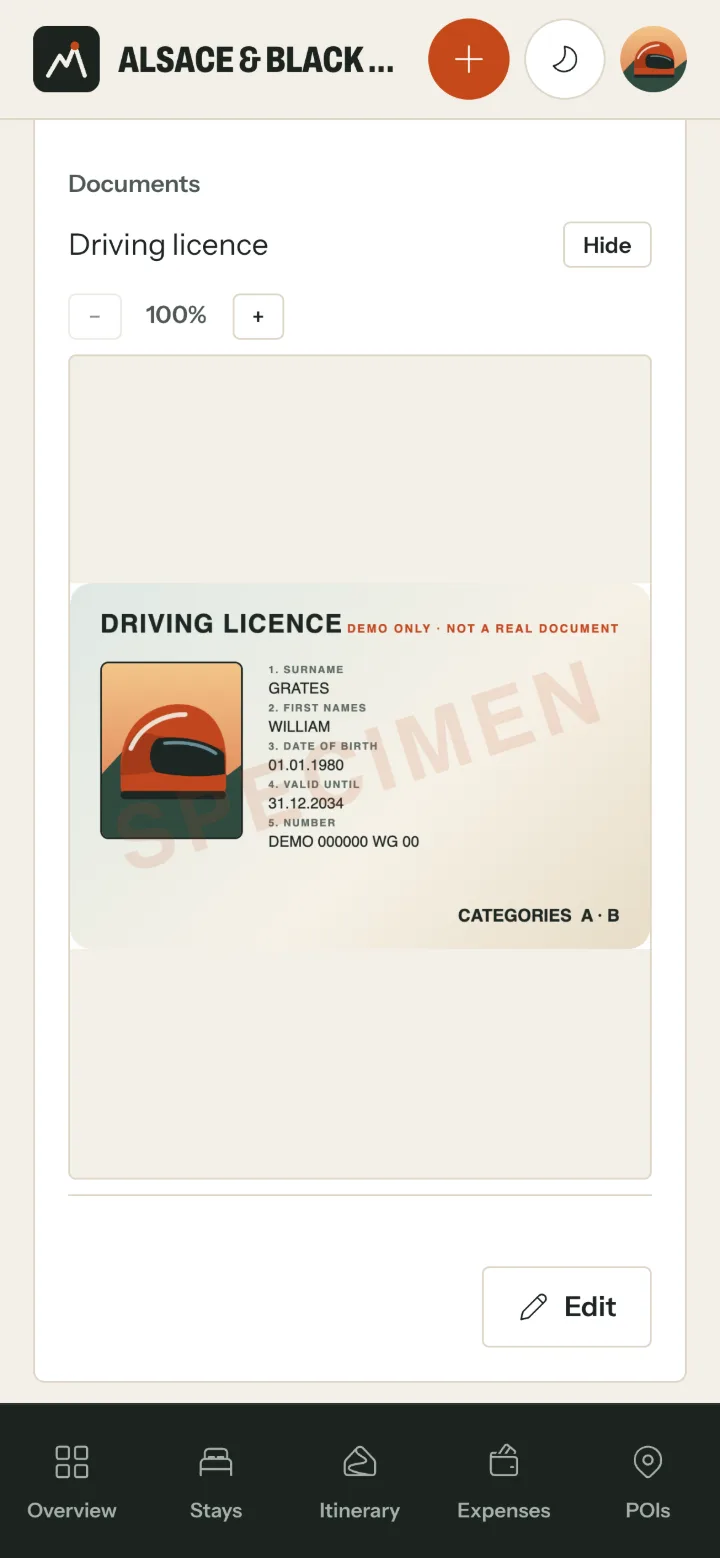
Your documents
Keep copies of your licence, insurance and the like in My details, under My documents, so they're on your phone when you need them. Only you can see them - not organisers, not administrators.
8. Night mode
3 screenshots
Everything has a night version, easier on the eyes after dark. It follows your phone or computer's light / dark setting; the moon / sun button switches by hand.
More questions?
The FAQ answers the common ones - or ask your trip's organiser.